
#
You can create and customize your own colorization settings to use in Stratus Desktop, such as black & white, sepia, or other tones and styles. By default you will have the Black & White and Sepia options. You cannot delete these two colorization presets, but you can modify them.
-
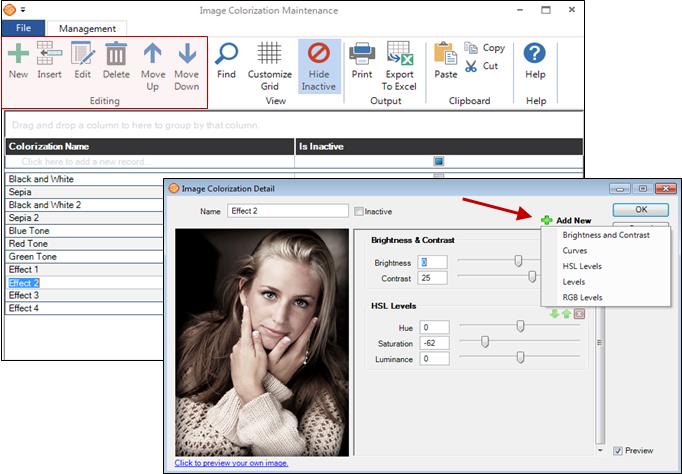
Go to Maintenance > Digital > Image Colorizations to set up your colorization options.
-
Click Edit or New in the Editing group of the ribbon to modify existing colorizations or add new ones.
-
On the Image Colorization Detail page, type the Name for the colorization preset. When creating colorization presets you have a number of adjustments you can set, all similar to tools used in Photoshop to correct or enhance images:
-
Brightness & Contrast – Use the sliders to increase or decrease brightness and contrast.
-
HSL Levels – Use the sliders to increase or decrease hue, saturation, or luminance.
-
RGB Levels – Use the sliders to increase or decrease the red, green, and blue levels.
-
Curves – Click Modify Curve Adjustment. Select the channels you would like to adjust and then click and drag to adjust the curves.
-
Levels – Click Modify Level Adjustment. Select the channels that you would like to adjust and then click Black, Gray,and White Input Level settings and/or the Black and White Output Level settings to adjust the levels.
-
If any of the image adjustment options aren’t shown, click Add New to add them.
-
Click the green arrows in each group of adjustments to determine the order the settings will be applied to the image.
-
Click OK to save the preset.