
#
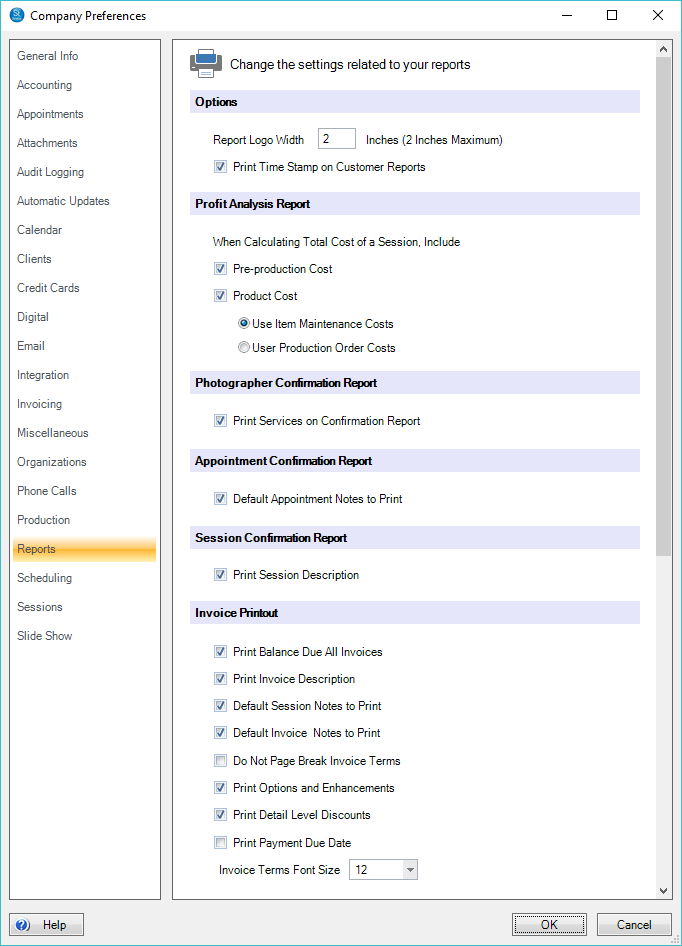
On the Reports tab, you can set more reporting options for the software.
 #
#
Options #
-
Report Logo Width – If you set up a company logo on the General Info page in Company (Studio) Preferences, the logo will automatically be included in the header of your reports. Here you can set how wide you want your logo to be on the reports. See also: Company (Studio) Preferences – General Info
-
Time Stamp – You can choose to include a time-stamp on all customer reports.
Profit Analysis Report #
You have several options for calculating the total cost of each session on the Profit Analysis Report:
-
Pre-Production Costs – Include proofing costs as determined by the vendor invoice amount you enter on the pre-production order.
-
Product Costs – Include product costs that may apply. There are two option to calculate product costs:
Option 1 – Item Costs – Uses the cost for each item on an invoice from the Costs tab of the Item Maintenance. See also: Price List Reference
Option 2 – Production Order Costs – Uses the cost from the vendor invoice amount that you fill in on each production order. See also: Production Order Reference
The first option requires more initial setup, but product costs are then calculated automatically. The second option requires you to manually input the figures you receive from your vendors’ invoices, but should be more accurate than the first method.
See also: Profit Analysis Report
Photographer Confirmation Report #
The Photographer Confirmation report prints the session information for the photographer’s records. If you want the photographer to see the fees and services associated with the session, check the Print Services on Confirmation Report checkbox.
Appointment Confirmation Report #
If you want appointment notes to print on the Appointment Confirmation report by default then check the box. You can later choose whether or not to print these notes on specific appointments.
Session Confirmation Report
If you want the session description to print on the Session Confirmation report by default then check this box.
Invoice Printout #
-
Print Balance Due All Invoices – Prints the client’s total open balance at the bottom of each invoice in addition to that invoice’s balance.
-
Default Session Notes to Print – Prints session notes on the session confirmation by default. You can later choose whether or not to print these notes on specific sessions.
-
Default Invoice Notes to Print – Prints invoice notes on the invoice by default. You can later choose whether or not to print these notes on specific invoices.
-
Print Options and Enhancements – Prints any options or enhancements chosen by the client on the invoice.
-
Print Detail Level Discounts – Prints line item discounts on the the invoice.
-
Invoice Terms Font Size – Change the font size used for printed terms.
 #
#
Image Detail Printout #
-
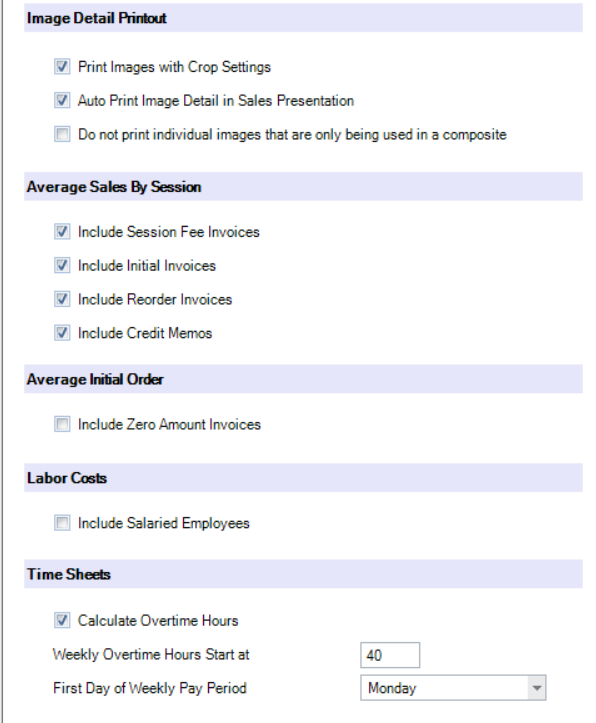
Print Images with Crop Settings – Choose whether you want your images to remain cropped when printing the Image Detail sheet. See also: Printing an Image Detail Sheet
-
Auto Print Image Detail in Sales Presentation – Choose whether you want the image detail to automatically print after a sales presentation.
-
Do not print individual images that are only being used in a composite – Choose this option to only display a single example of an ordered composite template when printed with the image detail sheet.
Average Sales By Session #
Dashboard reports are used to track your session averages. Use the Average Sales By Session options to select which types of invoices you want included in your session sales averages. See also: Dashboard
Average Initial Order #
If you prepare invoices ahead of time that don’t contain any items, they will have a zero balance. Because zero-balance invoices can throw off your reports, by default the software will not include these zero-balance invoices when reporting average initial orders. Check Include Zero Amount Invoices if you want the software to include them in your Dashboard reports. See also: Dashboard
Labor Costs #
Include salaried employees when calculating labor costs.
Time Sheets #
Check to Calculate Overtime Hours for your employees. Also choose at which time an hourly employee will begin earning overtime as well as the first day of the weekly pay period. By selecting the first day of the work week, the Time Clock will automatically reset for a the new work week. See also Time Clock.