
#
The Edit Mode in Price List Maintenance gives you a powerful way to make quick changes and view a number of items at once.
Using Edit Mode #
Click Edit Mode on the ribbon to turn on the grid and then choose one of the following options under Customize Grid:
Option 1 – Simple View #
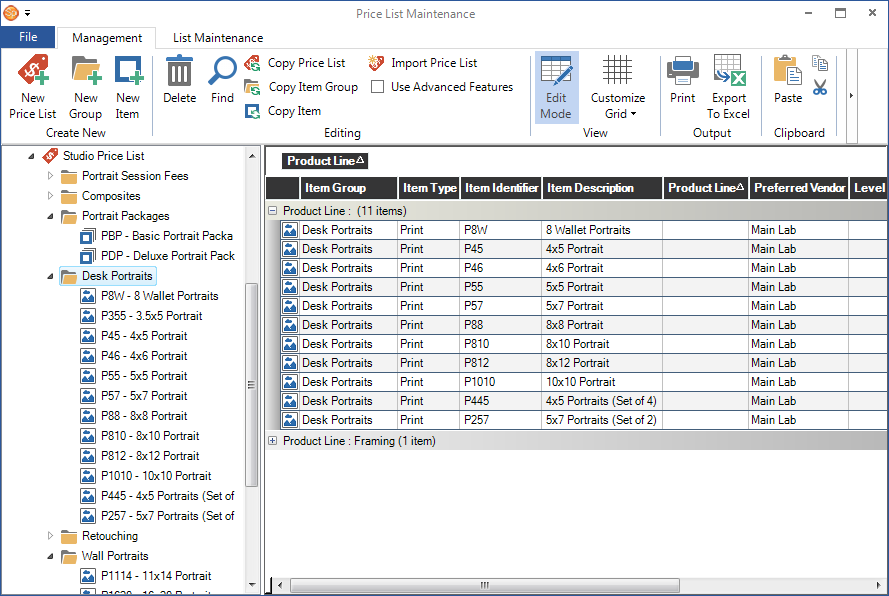
In the simple view, the price list items appear in a grid – just click any cell and make
changes. Click a price list, category, or group in the Price List Explorer panel on the left to display price list items in the grid in the panel on the right. If you choose a price list, you will see all of the items in that price list. Click on a category or a group to limit the items to just those in that category or group.
Modifying the Grid #
-
Sort – Sort by any column by clicking on the column header. Sorting in this manner does not change the order of the items in the price list, but just changes the display order in the grid.
-
Rearrange – Click and drag a header to rearrange the order of the columns.
-
Group – Click and drag a header to the space above the grid to group the items in the grid by that column. For example, in the screenshot below, the items are grouped by product line.
Entering a New Item in the Grid #
As long as the items displayed in the grid are not currently being grouped (as described above), you can enter a new price list item in the first blank row. Choose the contents for each cell from drop-down lists where appropriate or type directly into the cell. Newly created items must include a price list, item category, item group, and description.
Option 2 – Extended View #
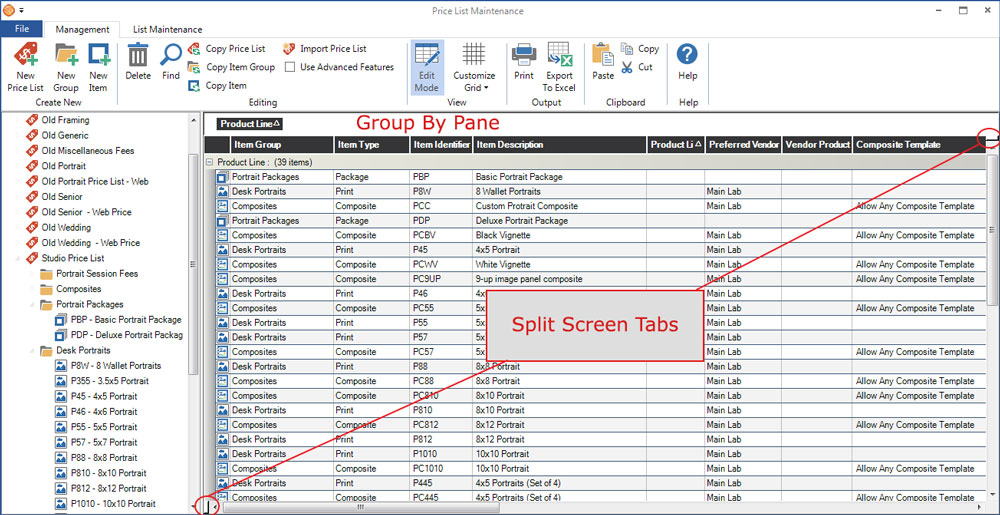
The extended view is similar to the simple view, but there are more columns available in the grid. In fact, there will probably be more columns available than will fit on your screen! There is a horizontal scroll bar at the bottom to help you see all the columns. In the extended view you can also drag and re-arrange columns.
Split Screen #
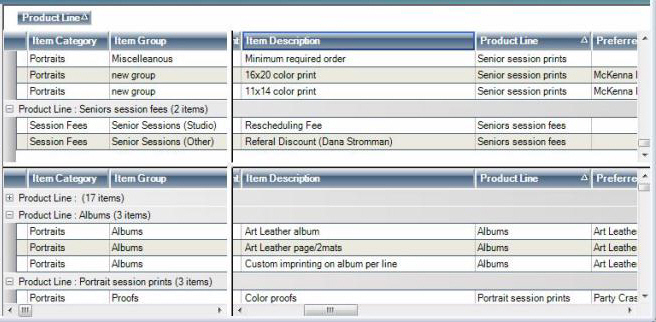
This option allows you to split the screen so you can see two parts of the grid synchronized in one view.
-
On the left end of the horizontal scroll bar, there is a small tab that you can drag to the right and then scroll each side of the split screen to the right or left independent of the other.
-
When you use the vertical scroll bar, the splits stay in place so you can see the desired columns as you scroll down.
-
You may also notice the same tab at the top of the vertical scroll bar if you have many items displayed in the grid. Drag that tab down to split the pane horizontally.
-
You could potentially split the screen both horizontally and vertically and see four widely separated parts of your grid at once.
-
The split screens are actually available in the simple view as well, but you would need to have enough rows or enough wider columns to display the scroll bars.
-
To make the splits go away, just drag them to the extreme ends of the panel.
Option 3 – Advanced View #
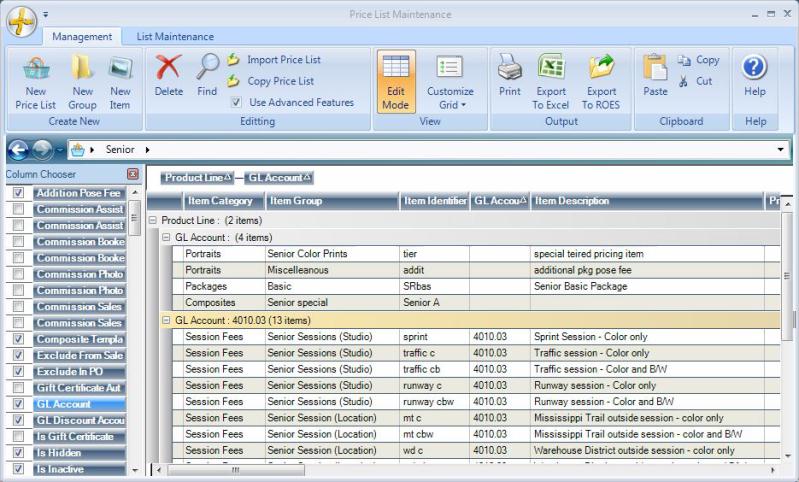
The advanced view provides you with even more columns than the extended view. Click Advanced View and a Column Chooser list will appear over the Price List Explorer in the left panel. Click to select an item you want added to the grid or drag and drop the column over the column headers in the right grid panel to add the column in the desired order. You can also drag a column from the list on the left directly to the “Group by” space at the top of the right panel.
Customized Grid #
-
Once you click X to close the Column Chooser, the grid will automatically resize your new columns using an auto-fit setting.
-
Open the File menu to Save the Grid Layout or Load a Grid Layout you have previously saved.