
   | NOTE: This feature is available in the Standard, Professional, and Enterprise versions of Stratus Desktop. |
Use time slots to define times on the calendar when certain types of sessions can be booked, either by someone in your studio or through online booking.
Time slots also give you control over what clients see online. For example, you may not want a 2-hour session booked at 4:30 when you close at 5:00, or you may only shoot a certain type of session on a specific day. And even if your schedule is wide open, offering just a few time slots each day makes you look busier than you are.
Using Bookings in Stratus Online? If your booking time slots come from Stratus Desktop, the time slots you mark Show Online here are the times clients can book. See Bookings Overview – Stratus Online.
Creating Time Slots #
Time slots can be created one at a time or in bulk. Watch the video and/or follow the instructions below to set up Time slots.
In order for a Time Slot, or the corresponding scheduled Appointment/Session, to appear on your Calendar, you MUST select the User/Resource whose schedule you want it to appear for.
Create Time Slots One at a Time #
Follow these instructions to define individual time slots on the calendar:
-
In Stratus, go to Maintenance > Session > Scheduling Time Slots.
-
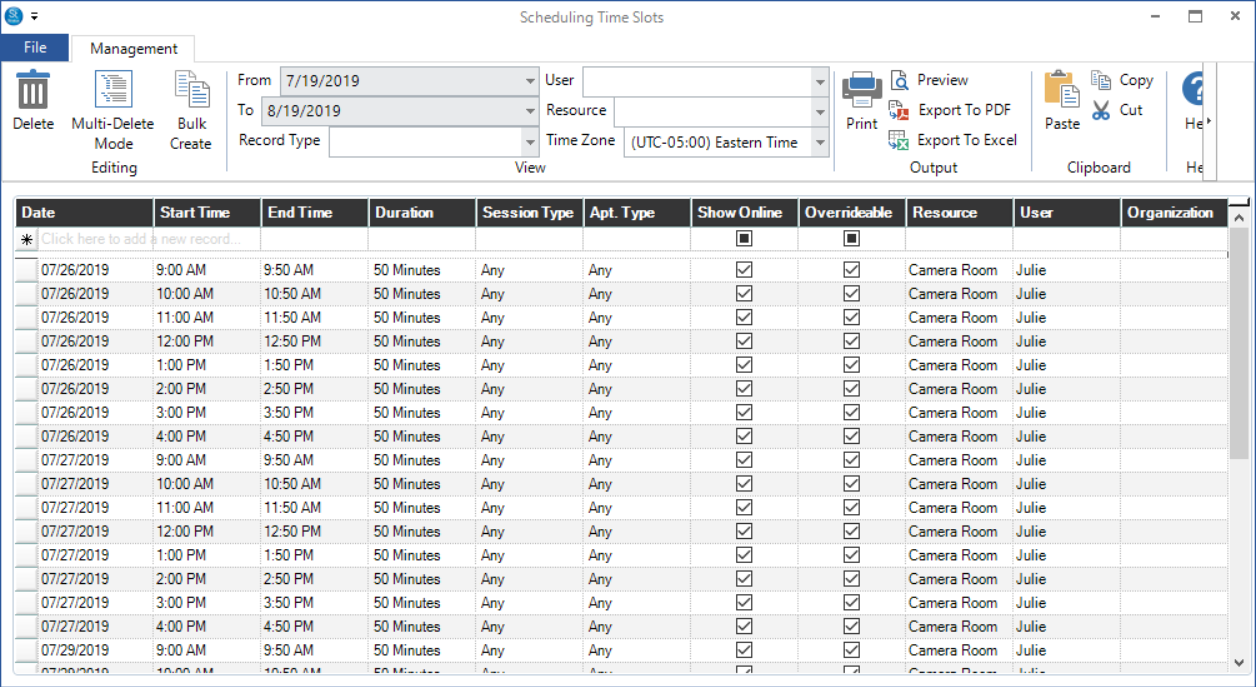
Use the first row of the grid to add a time slot.
-
Complete the following:
-
Date – Enter a date or click the arrow to choose a date from the calendar.
-
Start/End Time – Enter the start and end time of the time slot.
-
Duration – The duration will be calculated from the times you entered. Modify if necessary, although changing the duration will NOT automatically adjust the times.
-
Session Type – Choose the session type(s) for this time slot from the drop-down list. This will allow only sessions of that type (or types) to be booked into this slot.
-
Appointment Type – Choose the appointment type(s) for this time slot from the drop-down list. This will allow only appointments of that type (or types) to be booked into this slot.
-
Show Online – (This feature is available in Stratus


 ) Check this option to make the time slot available for online booking. If you don’t check it, the time slot is only visible on your internal calendar.
 -
Overrideable – This option allows users with the appropriate security permission to move or adjust the time slot.
-
Resource – Choose the resource (if any) that should be reserved for this time slot. The time slot will appear on this resource’s schedule.
-
User – Choose the user the time slot is for. The time slot will appear on this user’s schedule.
-
Add more time slots as needed.
-
Close the window when finished.
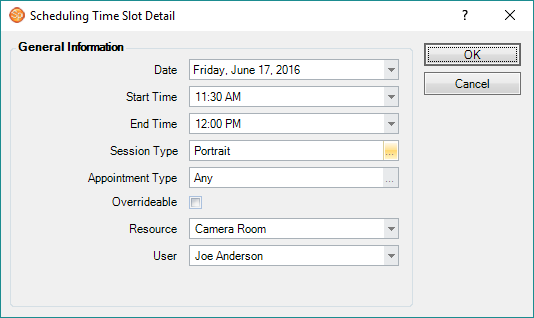
You can also add individual time slots right on the calendar! Just right-click on an available time and choose Create Time Slot. A window will open for you to complete the details for the time slot. The date and time will automatically default to where you clicked on the calendar. Click OK to save the time slot.
 \
\
Create Time Slots in Bulk #
The Bulk Create tool is great for when you need to quickly create a number of time slots that are identical. For example, create back-to-back time slots during a two week period for church directory work. This tool can also copy a set of time slots from one date range to another. Here’s how to use the Bulk Create tool to create or copy time slots:
-
In Stratus, go to Maintenance > Session > Scheduling Time Slots.
-
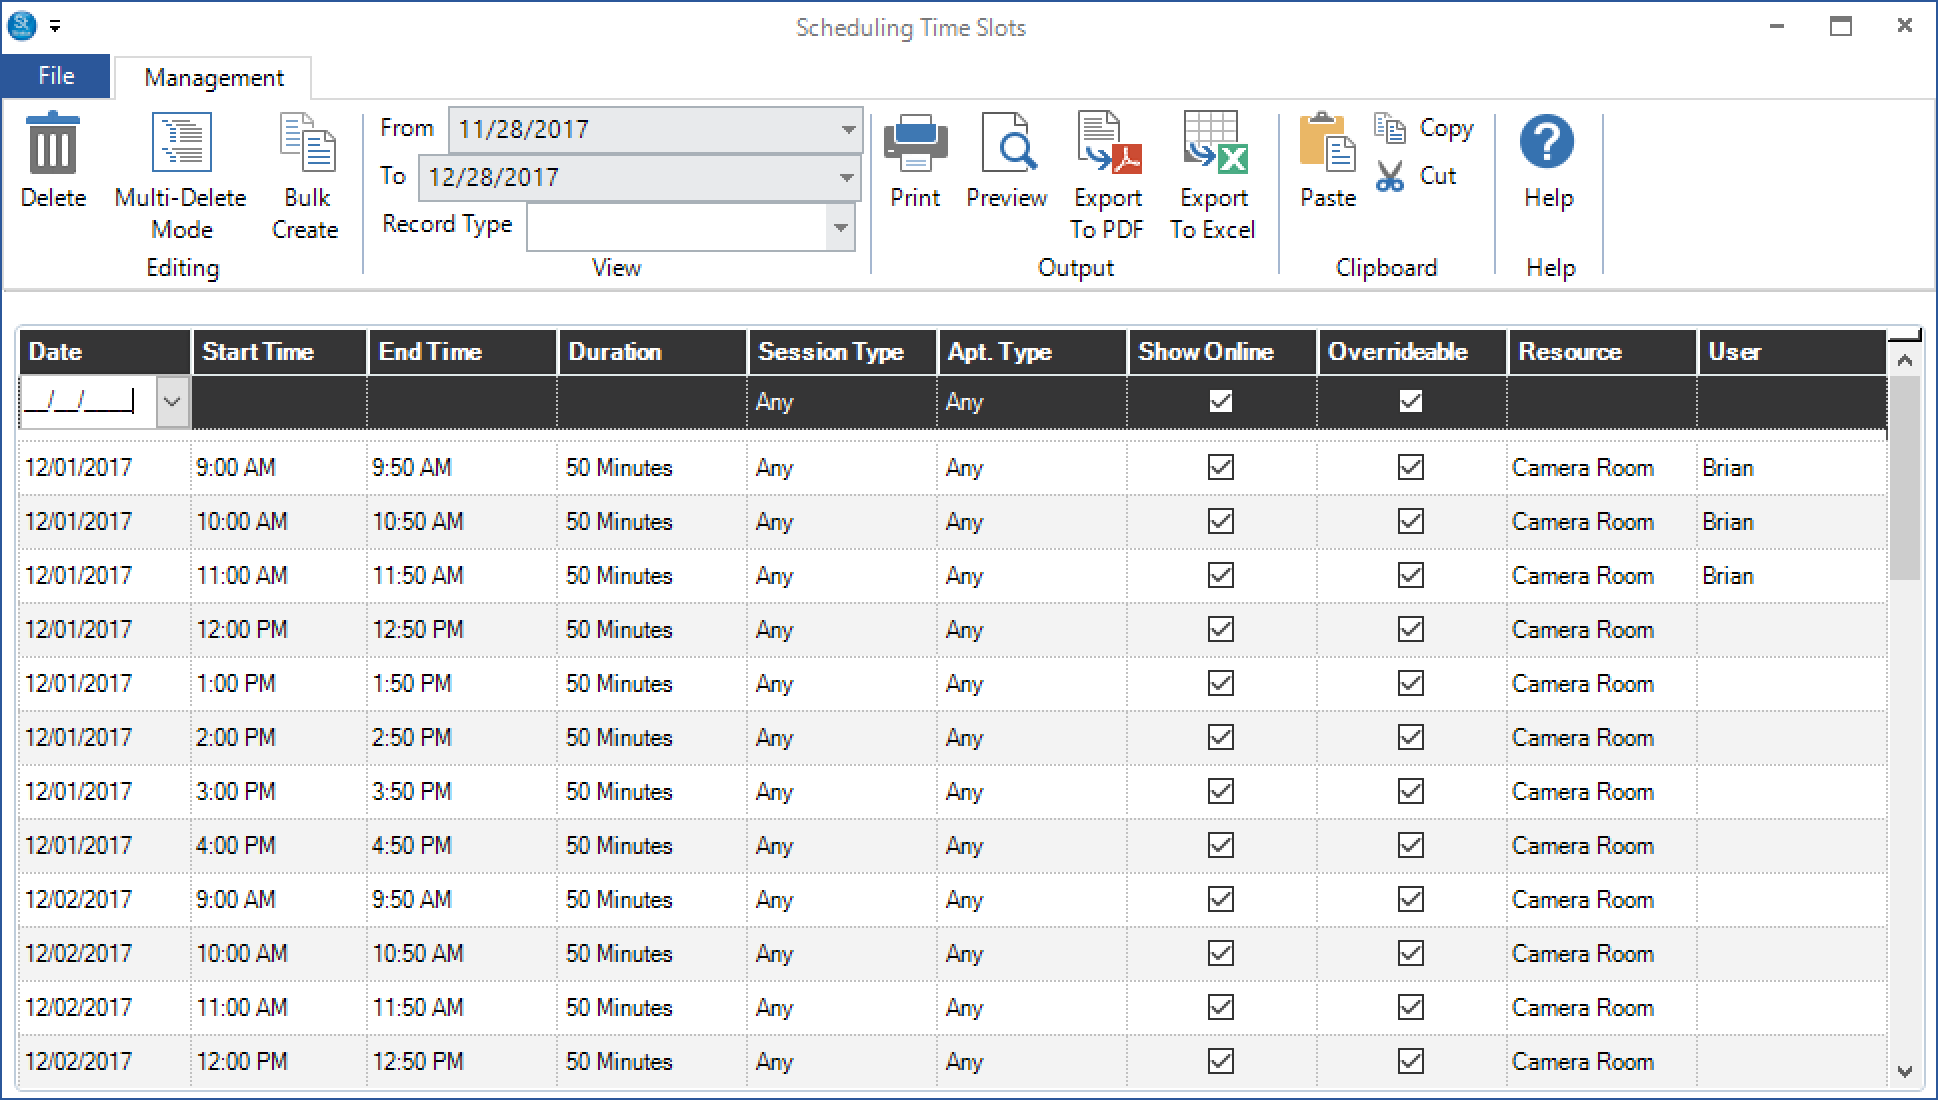
Click Bulk Create on the ribbon to open a new window. Note: You can also open this window from the calendar! Just click Time Slot on the ribbon and choose Bulk Create Time Slots.
-
Choose one of the following:
-
Copy Existing – Choose the first and last date in the range you want to copy from, along with the starting date you want the copied time slots to begin. Also indicate how many times to repeat the copy. All the time slots in the Copy From range will be copied to the period beginning with your Copy To date.
In the example below, all the time slots from 10/17/2016 through 10/21/2016 (five days) will be duplicated and fill the dates 10/31/2016 through 11/04/2016 (five days). The new time slots will be exactly the same as the originals, except for the date. You can modify the details of each time slot if necessary.
-
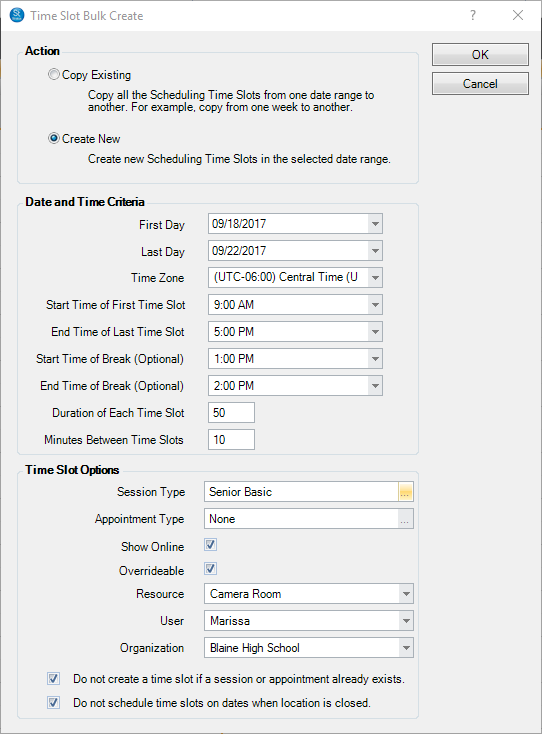
Create New – Enter the Date and Time Criteria and the Time Slot Options.
The example shown here will create 50-minute time slots from 9am to 5pm on all business days from September 18th through September 22nd. There will be a 10 minute “break” between time slots, and also a one-hour break at 1pm for lunch. These time slots can be filled with only “Senior Basic” sessions and no appointments. The time slots will appear on Marissa’s schedule, as well as on the Camera Room schedule. If Limit Time Slots to This Organization is checked in the Organization Maintenance for Blaine High School, then this time slot can only be booked by clients from that organization during the online booking process (See Online Booking for Organizations for more information).
-
Click OK and the software will create (or copy) the time slots.
Creating Time Slots from Online Booking Preferences #
Here’s how to set up a Control Center job to automatically create Time Slots from the Online Booking Preferences:
1. Go to Maintenance > Preferences > Online Booking Preferences > Time Slots (tab).
- Dates – Select Source Week (choose the week that already has Time Slots created as a “template” for the creation of future Time Slots). Next, determine the week to create the Time Slots.
- Schedule – Schedule the day for the job to be run.
- Options – Check boxes to prevent a time slot from being created, i.e. if a Session/Appointment is already created or if the studio is closed.
- Notification – Select preference for the job notification. Success/Failure description Notification: a notification will appear on the home screen of selected User.
- Email – An email will be sent to the selected email address describing if the job was successful/failed.
Managing Time Slots #
Deleting Individual Time Slots #
There are a couple ways to delete a time slot.
-
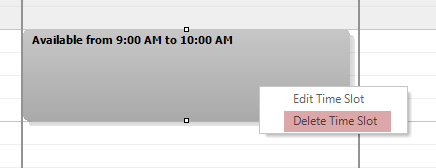
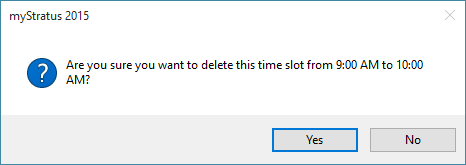
On the Calendar – Right-click on the time slot and choose Delete Time Slot. You will be asked to confirm the deletion.
-
From the Time Slot List – Go to Maintenance > Sessions > Scheduling Time Slots. Click the row of the time slot you want to delete and then click Delete on the ribbon.
Deleting Time Slots in Bulk #
From the Time Slot maintenance, you can delete a large group of time slots using the following instructions:- Go to Maintenance > Session > Scheduling Time Slots
- Select Multi-Delete Mode in the ribbon so it’s highlighted
- Use Shift-Click and CTRL-Click to highlight the rows you want deleted
- Click Delete in the ribbon to delete the highlighted rows
Modifying a Time Slot #
You can modify time slots on the calendar or in the time slot list.
-
On the Calendar – Right-click on an existing time slot and choose Edit Time Slot. Make changes to the time slot in the Scheduling Time Slot Detail window.
HERE’S A FLASH FOR YOU!You can also drag-and-drop and resize time slots on the calendar to quickly make changes!
-
From the Time Slot List – Go to Maintenance > Sessions > Scheduling Time Slots. Make changes as needed. Close the window when finished.
Conflicting Time Slots #
Maintenance > Session > Session Types > General Tab
This setting is also available for appointment types at Maintenance > Appointment > Appointment Types > General tab.
Auto-Remove conflicting time slots upon booking – Check this box if you want Stratus to automatically remove any conflicting time slots if one time slot is booked. For example, let’s say you have one 60 minute time slot with two 30 minute time slots in the same time period. If a client books the 60 minute time slot, then the two 30 minute time slots should now get deleted. If later the session is cancelled, all three time slots should reappear.
Sorting the Time Slot List #
As your list of time slots grows, use the View group of the ribbon to filter your list of time slots by Date and by Session Type.
Time Slot Security #
Use the Scheduling Time Slots security setting to control who can create and modify time slots. Options include: “No Access,” “Modify Overridable,” “Create New,” and “Full Access.” See also: Setting up Security
Viewing/Hiding Time Slots #
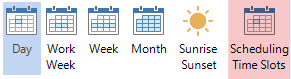
If you don’t want to see time slots on the calendar, click Scheduling Time Slots on the calendar ribbon to turn them on/off. See also: Calendar Overview
Each user can choose their default setting for displaying time slots on the General tab in their User Preferences. See also: User Preferences
Reinstate Time Slots #
A Time Slot will automatically reappear (re-open) after a Session/Appointment has been cancelled/rescheduled if there was already a Time Slot in place before it was scheduled.