Documentation

3. Creating Web Forms for Clients

3. Creating Web Forms for Clients in Stratus - screenshot 1 3. Creating Web Forms for Clients in Stratus - screenshot 2 NOTE: This feature is available in the Professional and Enterprise versions of Stratus Desktop. Spectra does not include this feature.

Before you can start using Web Forms to gather information for your clients and sessions, you need to design those forms. If you haven’t designed your forms yet, refer to Designing Web Forms.

Step 1 – Create Web Forms #

To allow a web form to be directly linked to a client, session, or invoice record, you’ll need to generate (create) individual forms for specific client(s), session(s), or invoice(s). Once a web form is created, it is immediately viewable on the Web Forms tab of the client, session, or invoice record and available for internal use. If the web form is also designed for the client to see and fill out, it will be made available during the time period specified in the web form template. There are three ways to create web forms — manually, automatically, and with triggers. Decide how you want to create web forms and perform any necessary setup.

MANUALLY

This option is used to create a single web form at a time. You can manually create forms from a session, client, and invoice record. Here’s how:

  1. Open the client, session, or invoice record.

  2. Click the Communication tab of the ribbon at the top of the record.

  3. Click the arrow under Web Form and choose which web form you want to create.

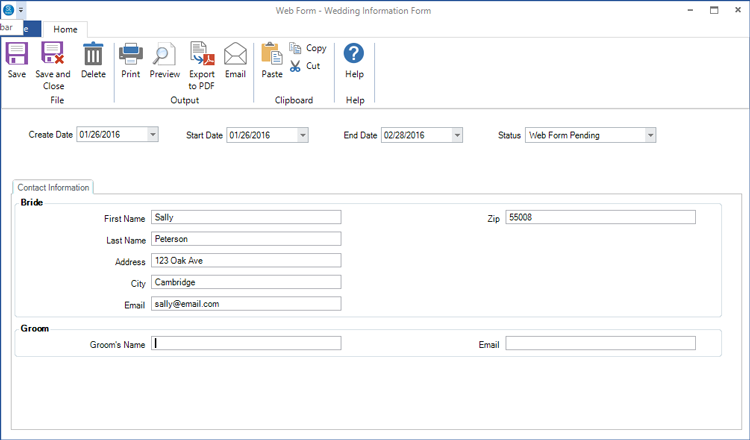
  4. The web form will be created and immediately available for in-house use on the Web Forms tab of the client, session, or invoice record. Double-click to open a form.

    3. Creating Web Forms for Clients in Stratus - screenshot 3

  5. The form will also be made available to the client according to the visibility rules you set up for the web form (Always or Limited). Here’s an example: You open a session that is scheduled for next month and create a “Session Feedback” web form. The visibility rules for that form are set up to start 1 day after the session date and end 7 days after the session date. In this case, the feedback form for this session would exist as soon as you create it, but it would only be visible to the client during the week following their session. Note: This works the same way when forms are automatically created.

  6. After the client submits the form, any linked fields will be updated in your database. The web form status will be updated, along with the client/session/invoice status updates specified in the template.

Note: If this is the method you choose, make sure you set up a system to make sure this is done regularly!

BULK

This option is used to create web forms for a large group of existing clients. You can bulk create forms using the Bulk Create Web Forms tool. Here’s how:

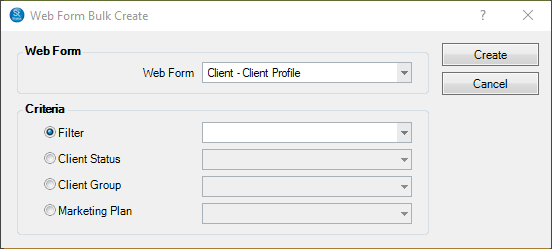
  1. Go to Maintenance > Web Forms > Bulk Create Web Forms.

  2. Select which Web Form you will be creating in bulk

  3. Based on the selected web form, choose which clients/sessions/invoices the form should be built for. The options for this are a Filter, Client Status, Session Status, Invoice Status, Client Group, or Marketing Plan. The filters and options available will vary depending on the type of web form selected – Client, Session, or Invoice based.  See also:  Building Web Forms

  4. Press Create to create the web form on respective client/session records.

    3. Creating Web Forms for Clients in Stratus - screenshot 4

  5. After the client submits the form, any linked fields will be updated in your database. The web form status will be updated, along with the client/session status updates specified in the template.

AUTOMATICALLY

This option is used to create web forms for new clients/sessions/invoices moving forward from when the form is created. Here’s how to enable auto-creation:

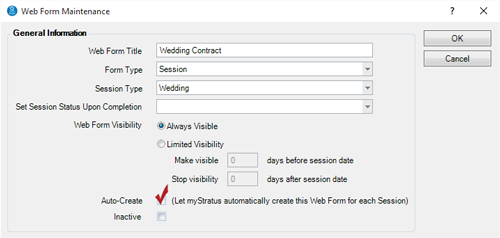
  1. Go to Maintenance > Web Forms > Web Forms to open your list of forms.

  2. Highlight the web form you want to modify and click Edit on the ribbon. (Or, just double-click the name of the web form.)

  3. Check the Auto-Create option. 
    3. Creating Web Forms for Clients in Stratus - screenshot 5

  4. Click OK to save your changes.

  5. Stratus will now automatically create the web form whenever a new client (or session/invoice) is created.

  6. Once Stratus creates a web form, it is immediately available for in-house use on the Web Forms tab of the client (or session/invoice) record. Double-click to open a form.

    3. Creating Web Forms for Clients in Stratus - screenshot 6

  7. The form will also be made available to the client according to the visibility rules you’ve chosen for the web form (Always or Limited). 

WITH TRIGGERS

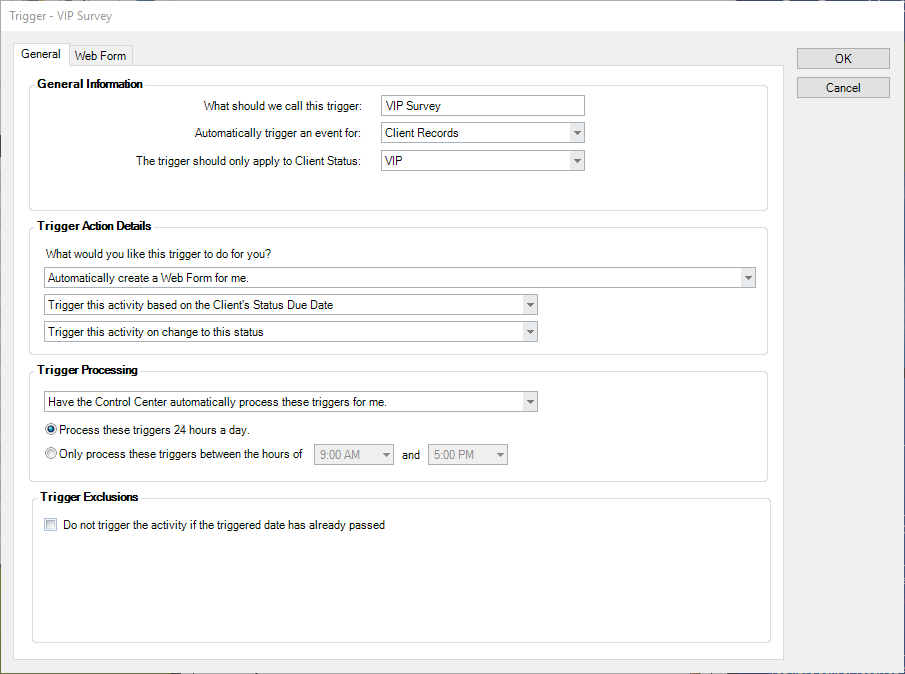
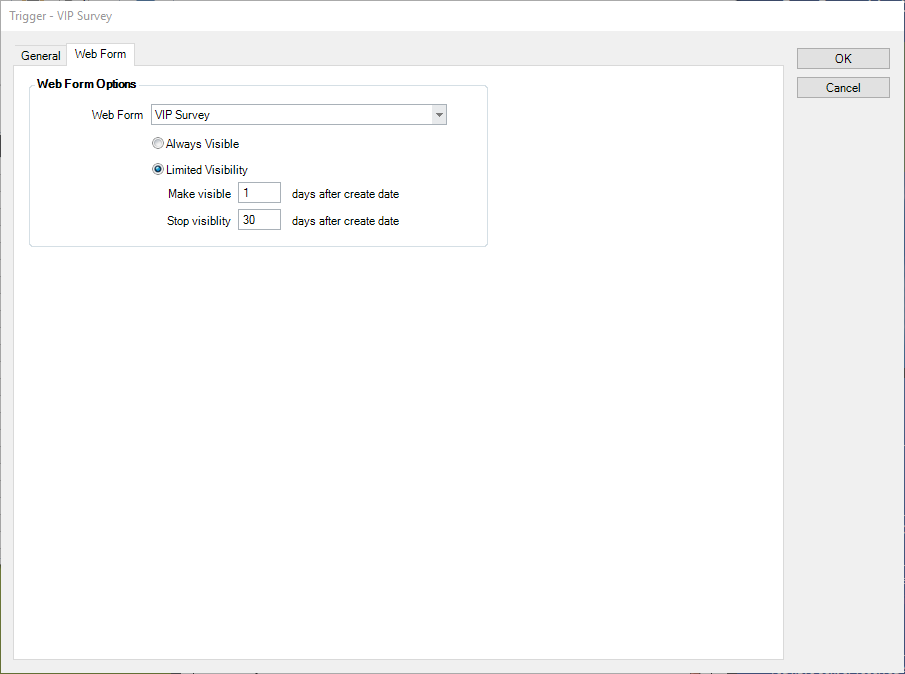
This option is used to create web forms over time based on a criteria. Stratus can automatically create web forms through Triggers. Here’s how you would set up a Client Status Trigger with the trigger type, Web Form:
  1. See Triggers for more information on creating Triggers.

  2. Under the Maintenance menu, select which type of trigger you would like to generate.
  3. Go to Maintenance > General > Triggers.

  4. Select New In the ribbon to create a new trigger.
  5. Fill in the details for how you want the trigger to operate, and make sure the trigger is set to Automatically create a Web Form for me:

  6. 3. Creating Web Forms for Clients in Stratus - screenshot 7

    3. Creating Web Forms for Clients in Stratus - screenshot 8

Step 2 – Notify Clients #

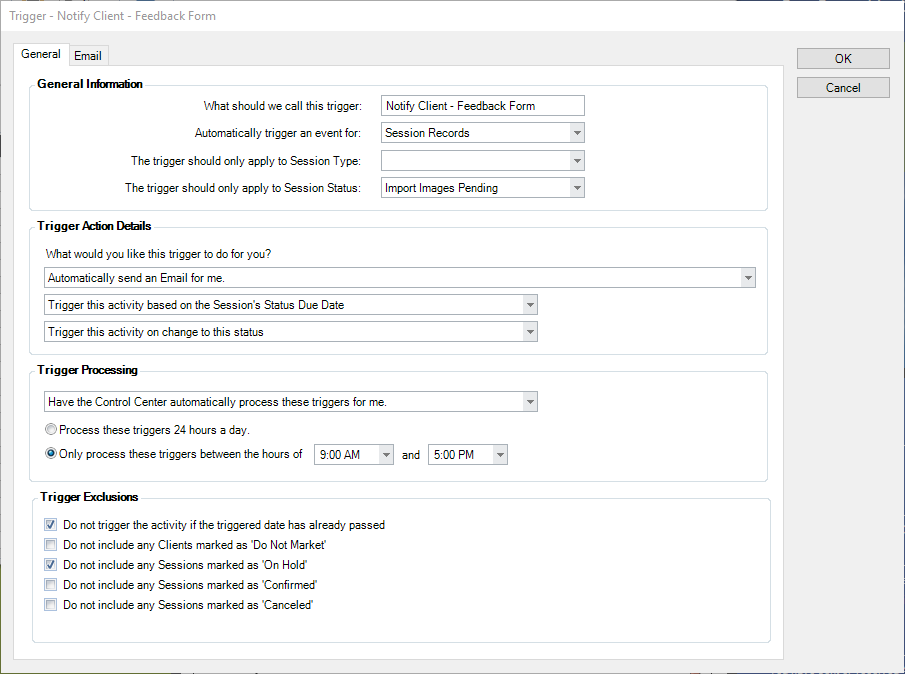
You’ll first need to notify clients that a form is available and provide them with the information they need to view it. The easiest way to do this is with triggers. Here’s how you would set up a trigger to email the client when a session feedback form is ready for them to view:

  1. Go to Maintenance > General > Triggers

  2. Select New to create a new trigger.

    3. Creating Web Forms for Clients in Stratus - screenshot 9

    Fill in the Description field, and then choose what options you want to use.

    Choose the session status. For this example, we chose the “Import Images Pending” status. This is the status we use after a session has been held.

    Click OK to save the trigger.

    Close the window when finished.

    Make sure to regularly process your triggers, either manually or with the Control Center. See also: Triggers

Step 3 – Process and Follow Up on Submitted Forms #

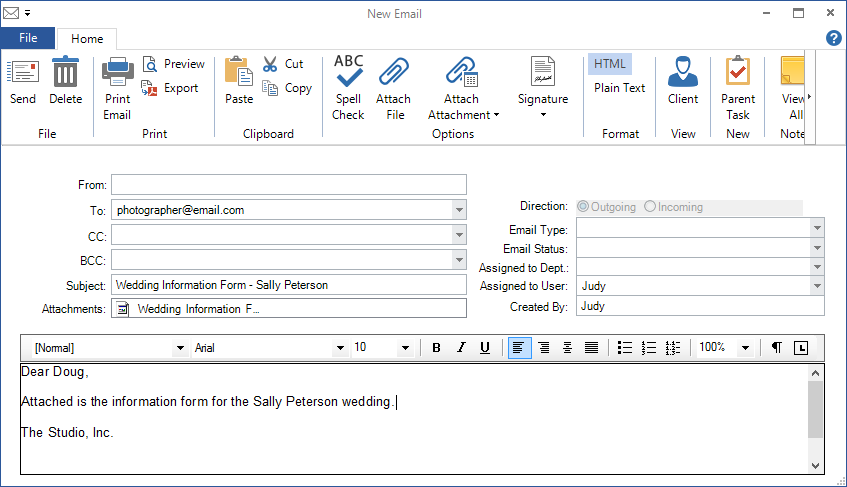
Watch your client, session, and invoice statuses and/or your task list and follow up when a new submission is received. You may want to email a PDF to the photographer or print a copy of the form.

  1. Open the client, session, or invoice.

  2. Click on the Web Forms tab. You’ll see a list of all the forms for this client, session, or invoice.

  3. Double-click to open a submitted form. Note: The Status column will indicate when a form has been submitted.

  4. Click Preview to see a web form before you print it. 

  5. Click Export to PDF to create a PDF version to save.

  6. Click Email to create a new email with a PDF of the form attached. Note: If you have any Print Only or Internal Use fields in the form, these WILL be displayed in the PDF. 
    3. Creating Web Forms for Clients in Stratus - screenshot 10

  7. Close the web form when finished.

  8. Save and close the session (or client/invoice).

Can't find what you need?

Email, chat, and phone support are included with every Stratus subscription. We’re here to help you build a successful business.