#
Note: Before defining your Lightroom Metadata Preset Details, make sure you’ve created one or more preset names in Maintenance > Digital > Lightroom Metadata Presets.
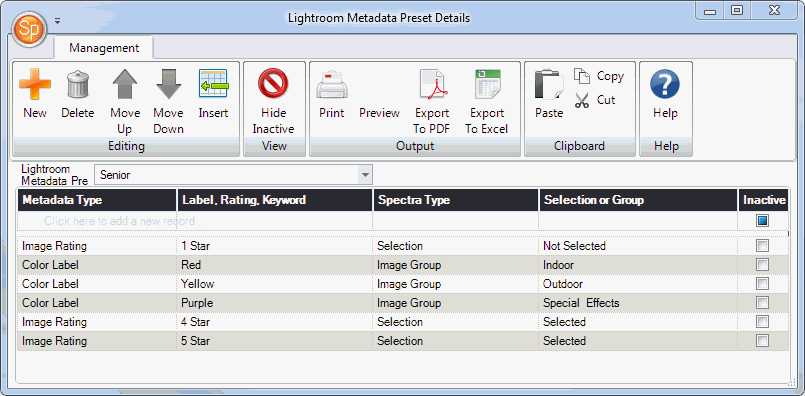
Defining the preset details is basically setting up a table of rules that let Stratus Desktop know what a Lightroom rating, color label, or keyword should “equal” in Stratus. Examples include:
-
An image with a rating of no stars in Lightroom should be marked as “Not Selected” in Stratus.
-
An image with a four star rating in Lightroom should be marked as “Selected” in Stratus.
-
An image with a red color label in Lightroom should be put in an image group called “Outdoor.”
-
An image with a yellow color label in Lightroom should be put in an image group called “Special Effects.”
-
and so on…
When you’re ready to define the preset details, open Maintenance > Digital > Lightroom Metadata Preset Details.
-
Select a Lightroom Metadata Preset from the drop-down list.
-
To add a detail line, click once in the blank row or click New on the ribbon.
-
In the first column, select a Metadata Type. These are items that have been assigned in Lightroom, including Color Label, Image Rating, and Keyword.
-
In the second column, enter or type the Lightroom selection that you will be defining for Stratus. Note: When typing in color labels or keywords, make sure to type it in exactly as it appears in Lightroom, including capitalization.
-
In the third column, select whether metadata of this type will translate to a Selection or an Image Group in Stratus.
-
Finally, in the fourth column, enter or select the specific selection rating or image group.