General Tab
|
|
Client Information
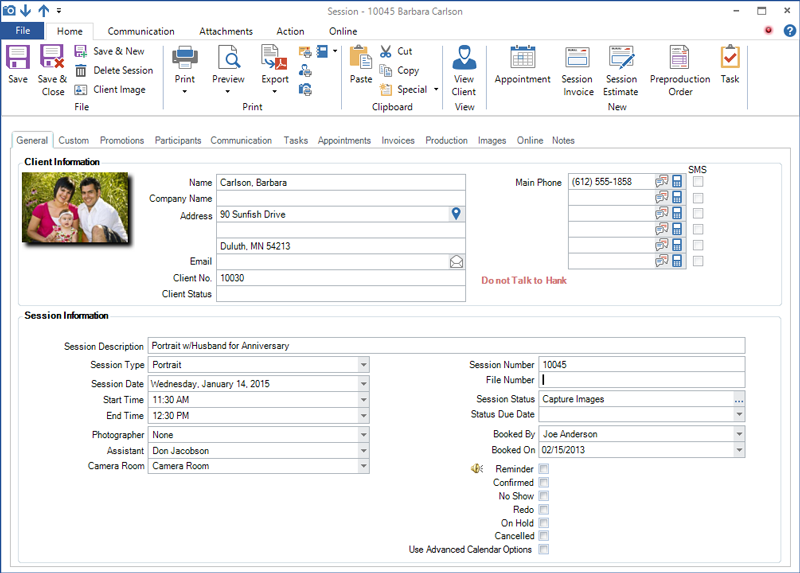
The main session client’s information is displayed in the top portion of the General tab. This includes the client’s name, contact information, client status, and a red call warning (if one exists). This information is read-only. To modify the client information, click View Client on the ribbon.
Session Information
Use this section to view or enter the session description, session type, session date, session start time, session end time, studio, photographer, assistant, and outside location (if any). Each field is described below.
| Field |
Description |
| Description |
Brief description about the session such as “Family Session.”
|
| Type |
Session types are listed in the drop-down list. You may define as many session types as you need, but just one session type can be chosen per session. Session types are created under Maintenance > Session > Session Types. See also: Session Types
|
| Date |
The date of the session.
|
Start Time
|
The time the session will begin. Type in the time or choose it from the drop-down list.
|
End Time
|
The time the session is scheduled to finish. Type in the type or choose it from the drop-down list.
|
| Photographer |
The name of the person taking the photographs. You can type this in or choose from the drop-down list. The session will appear on this user’s calendar.
|
| Assistant |
The person (if anyone) who will be helping the photographer. You can type this in or choose from the drop-down list. The session will appear on this user’s calendar.
|
| Camera Room |
The studio location or outside location (if any) where the session will take place. You can type this in or choose it from the drop-down list. The session will appear on the calendar for this resource. The selection is also stored with the session as the Resource. This field can be used in form letters, filters, the column chooser and more. Once of the choices on the list is “Outside Location.” Outside locations can be set up in the software to store the address and phone number for locations you use regularly. See also: Outside Locations |
| Arrival Time/Drive Time
|
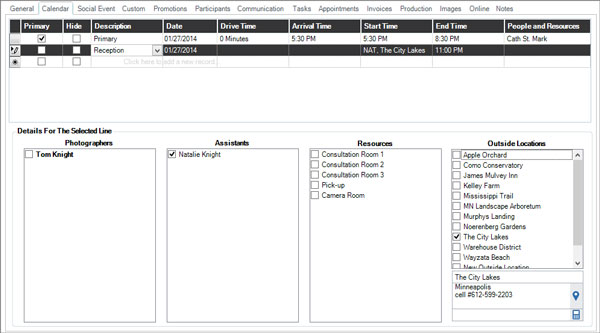
If an outside location is chosen, use these fields to record how long it will take to the location and when you are required to arrive. Use the Calendar tab in Company (Studio) Preferences to indicate how you want these times to be reflected on the calendar. See also: Company (Studio) Preferences – Calendar |
Session Number
|
The session number is a unique number the software assigns to each session. You can change this number to another UNIQUE number. You can change when and how the software assigns session numbers on the Sessions tab in Company (Studio) Preferences. See also: Company (Studio) Preferences – Sessions
|
File Number
|
Used to record any internal number your studio uses to track sessions.
|
Session Status and Due Date
|
The current status of the session and the date it is due to advance to the next status. See also: Session Statuses |
Booked By Name and Date
|
The software automatically records the user that booked the session and the date the session was created. |
Reminder
|
Check the Reminder box if you want the software to display a reminder on the screen before the session starts. Select the number of minutes before the session starts that you want the reminder to appear. |
| Confirmed |
Check the Confirmed box if this session has been confirmed with the client. Doing so will give you the option to display the word “Confirmed” on the calendar next to this session. Sessions can also be confirmed by email with the StudioPlus Mail service. See Confirmation Emails for more information. The software will automatically record the Date Confirmed, which can then be used in form letters, filters, the column chooser, and more.
|
No Show
|
Check the No Show box if the client did not show up for their session. These sessions will be flagged in the system for future reference. |
| Redo |
Check the Redo box if this session is a retake for a previous session. |
On Hold
|
Check the On Hold box if this session is on hold. Note: These sessions will NOT appear on the calendar. |
| Cancelled |
Check the Cancelled box if this session has been cancelled. These sessions will not appear on the calendar so you can book other sessions in that time slot. |
| Use Advanced Calendar Options |
This option allows you to select multiple times/dates, photographers, resources, and other combinations for more advanced scheduling. Maybe you have a session that spans two days or a wedding where you need to record the date and time for the pre-ceremony locations and the ceremony locations. Once you check this box, a new Calendar tab will appear right after the General tab. See the Calendar tab section below for more information. See also: Advanced Scheduling
|
|
Organization Tab  
|
| Note: This tab is only visible for session types with an “Organization” session style. See also: Session Types
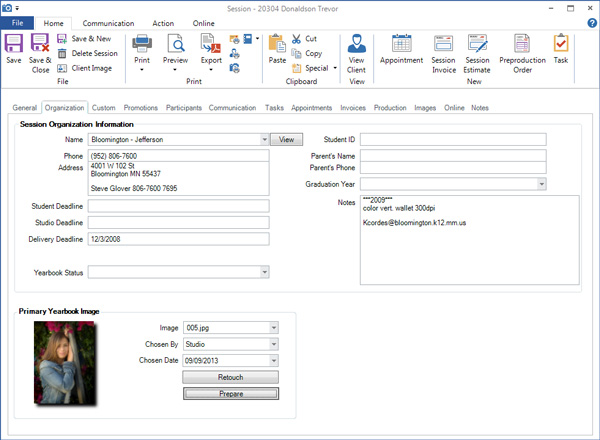
View or enter organization information on this tab. If the client has information on their Organization tab, this information will automatically be transferred here. See also: Session Types
| Field |
Description |
| Name
|
The organization is selected from the list of organizations you’ve set up in Stratus. All remaining organization-related fields will fill in automatically. Click View to see all the information for the selected organization. To add or modify an organization, go to Maintenance > Client > Organizations and complete the information for that organization. See also: Organizations |
| Phone and Address
|
This information is read-only. To modify the information, go to Maintenance > Client > Organizations. See also: Organizations |
| Deadlines |
This information is read-only. To modify the information, go to Maintenance > Client > Organizations. See also: Organizations |
| Yearbook Status |
To help track yearbook selections, create yearbook statuses in Maintenance > Session > Yearbook Statuses. See also: Yearbook Statuses |
| Student ID
|
The student ID can be used in the naming process for yearbook images and can also be used to search for duplicate records within an organization. The student ID number is shown here but can only be modified on the Organization tab on the client record.
|
| Parent’s Name and Phone
|
Track the name(s) and phone number of the student’s parents, if applicable. |
| Graduation Year
|
If this is a senior, choose the year they will be graduating from the drop-down list. The list should include the last ten years and ten years into the future. |
| Notes
|
This information is read-only. To modify the information, go to Maintenance > Client > Organizations. See also: Organizations |
| Yearbook Image |
Select the yearbook image using the drop-down list. You can also select the yearbook image(s) on the Images tab or on the Digital Workflow screen by right-clicking an image and selecting “Make This Image the Main (or Secondary) Yearbook Image.” Note: The session must be an organization style session in order for this option to appear. |
| Chosen By |
Indicates who selected the yearbook pose – the student, the school, the parent, or the studio. If the pose was selected in Stratus, this field will default to “studio.” If selected on InSpiredByYou.com, it will default to “student.”
|
| Chosen Date |
The date the yearbook pose was selected. |
| Retouch |
Click Retouch and the software will copy the hi-res image into the retouched folder and then open that image in your imaging software for editing. |
| Prepare |
Click Prepare and the software will open either the retouched or the hi-res image in a new composite window. Here the image can be resized and positioned. Click OK to have the software render out a new final image according to the organization’s specifications and save it in the new yearbook images folder for this organization. See also: Organizations
|
|
Social Event Tab
|
| Note: This tab is only visible for session types with a “Social Event” session style. See also: Session Types
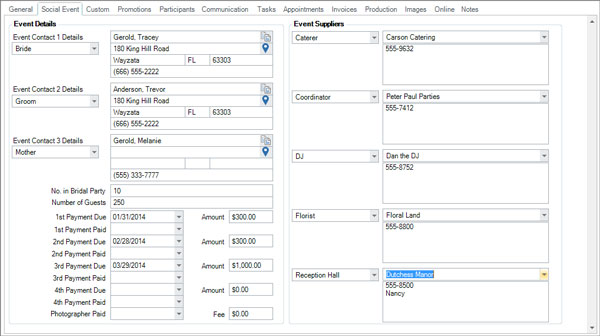
Use this tab to track specific information related to weddings and other social events. See also: Session Types
| Field |
Description |
| Event Contact Details |
Store contact information for up to three people. |
No. in Bridal Party
|
Record the number of people in the bridal party.
|
Number of Guests
|
Record the number of expected guests. |
Payments
|
Record when the payments are due and when they are paid. Note: These payment information fields have no tie to an invoice or actual payments recorded on an invoice. They are here so they can be used in form letters and session confirmations.
|
Photographer Fee
|
For your information only.
|
Event Suppliers
|
Choose a supplier type from the drop-down list and then choose a specific supplier. See also: Social Event Suppliers and Social Event Supplier Types
|
|
Custom Tab 
|
| You can use custom session fields to track additional information that isn’t already stored in the software. There are dozens of custom fields available. Define how these fields are labeled in Maintenance > General (Studio) > Custom Labels. See also: Custom Labels
|
Participants Tab
|
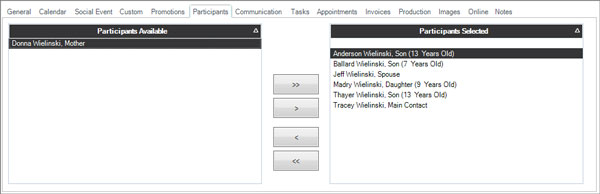
| This tab lists the client and all family members in the left panel. Move any participating family members to the right panel. See also: Adding Family Members
|
Communication Tab
|
| This tab lists all communications related to the session. Double-click on a communication to view the details.

| Field |
Description |
| Due Date |
The date the communication is to be made.
|
Complete Date
|
The date the communication was actually completed.
|
| Type |
The communication can be a phone call, letter, email, or SMS text message.
|
| User |
The user who is assigned to make the call or the user that sent the letter, email, or text.
|
Call Type
|
When the communication is a phone call, the call type indicates what type of call should be made (i.e., “Customer Service,” “Session Follow-Up,” etc.). See also: Phone Call Types
|
| Description |
Shows the description that was typed into the call record, the name of the letter, or the subject line of an email.
|
| Direction |
Indicates whether the communication was outgoing or incoming.
|
|
Tasks Tab
|

This tab lists all tasks related to the session. Double-click on a task to view the details.
| Column |
Description |
| Urgent
|
This column will contain a symbol if the task has been marked as urgent.
|
Due Date
|
The date the task should be completed by.
|
Task Number
|
A unique number assigned by the software and used for tracking purposes.
|
| Subject |
Contains a description of the task.
|
| Status |
The current status of the task. See also: Task Statuses
|
| Assign to User
|
The user the task is assigned to.
|
| Assign to Dept
|
The department the task is assigned to. See also: Departments |
|
Appointments Tab
|

This tab lists all appointments – past and present – linked to the session. Double-click on an appointment to view the details. You can create a session-linked appointment by clicking the Appointment button in the New group of the ribbon. Note: Appointments that are not created from a session cannot be linked to a session.
| Column |
Description |
| N and C |
These read-only columns display the status of the “No Show” (N) and “Cancelled” (C) options for the appointment.
|
| Appointment Date |
Primary appointment date.
|
| Type |
An appointment type would be something like “wedding consultation.” See also: Appointment Types
|
| Description
|
An appointment description tells you the reason for the appointment. It could be something like “Wedding consultation with Bill and Sue to finalize session time.” This description is displayed on the calendar.
|
|
Invoices Tab
|

This tab lists all invoices related to the session. To view the complete details for an invoice or to modify it, double-click on the entry.
| Column |
Description |
| View Options |
The options at the top of this tab can be used to choose which invoices you want to see:
-
All Invoices – View all invoices for this session, whether they are being billed to the session client or the bill-to client.
-
Session Invoices Only – View just those invoices where the client being billed is the main session client.
-
Bill-To Invoices Only – View just the invoices where the client being billed is not the main session client.
|
| Invoice Number |
The invoice number is a unique number assigned by the software when the invoice is saved.
|
Invoice Date
|
The date the invoice was created. |
| Type |
Indicates one of the following invoice types:
- Initial Order
- Session Fee
- Reorder
- Credit Memo
- Estimate
|
| Description |
The description is used to help you identify what the invoice is for.
|
| Invoice Total |
The total dollar amount of the invoice.
|
| Amount Paid |
Shows how much has been paid toward the invoice.
|
| Balance Due |
The amount still owed for the invoice.
|
|
Production Tab
|
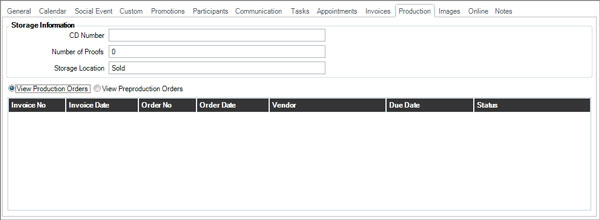
This tab lists all production and preproduction orders related to the session. Double-click on a production order to view the details.
| Column |
Description |
| View Options |
The options at the top of this tab can be used to choose whether you want to see Production Orders or Preproduction Orders. |
| Invoice Number |
Displays the number of the invoice associated with the production order. Note: Preproduction orders are generated from a session and will not have an associated invoice. |
Invoice Date
|
Shows the original date of the associated invoice.
|
Order Number
and Date |
Shows the PO number and date it was created.
|
| Vendor |
The specific vendor chosen to fulfill the PO. See also: Vendors
|
| Due Date |
The date the order is due back from the vendor.
|
| Status |
Indicates where the PO is in the workflow cycle. See also: Production Statuses and Preproduction Statuses
|
|
Images Tab
|
|
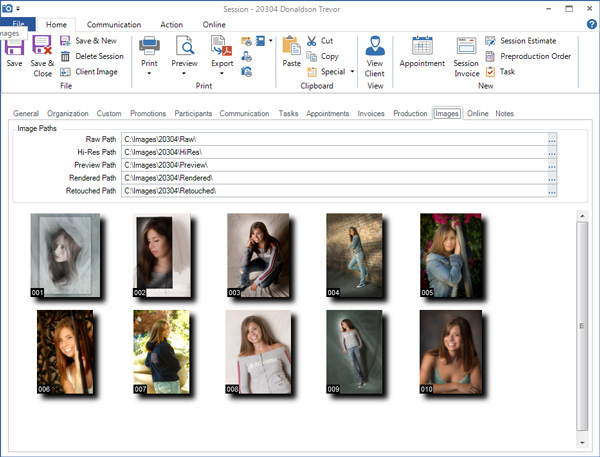
This tab displays thumbnail images from the session, along with the paths to the session’s image folders. By default, the image paths are based on your settings on the Digital page of Company (Studio) Preferences. To set a different path for this session, click on the browse button (…) and navigate to the drive and folder that contains the images. See also: Setting up Digital Workflow
|
Online Tab
|
|
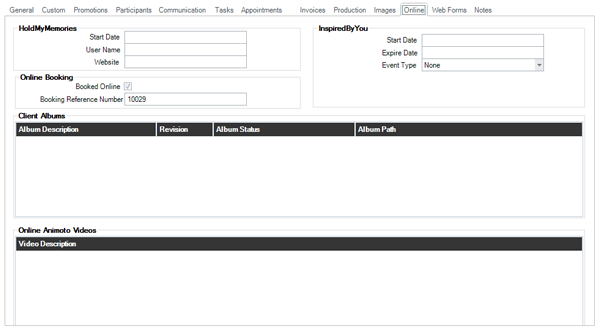
The Online tab is used to quickly reference a session’s Online Booking, InSpiredByYou.com, and HoldMyMemories.com information. This is also where information about any client albums and/or Animoto videos attached to the session is displayed. See also: Online Booking (Stratus ONLY) and Using InSpiredByYou.
Online Booking (Stratus ONLY) #
InSpiredByYou #
-
Start Date – Date the session was uploaded to InSpiredByYou.com.
-
Expire Date – Date the online session is set to expire.
-
Event Type – Displays the type of online event chosen for this session — Public, Private, or None. An Event Code and Event Description box will also be displayed for public and private events.
|
Notes Tab
|
This tab contains both Session Notes and Status Notes.
-
Session Notes are used for your notes regarding the session. Use Ctrl+T to stamp the current date, time, and initials of the logged in user into the notes. Use the ABC button to check the spelling. Check the Print These Notes option to include the session notes on any session confirmations.
-
Status Notes are automatically maintained by the software, providing a history of changes made to the session. The software creates an entry when the session status changes, when the date or time of the session changes, when the session is confirmed and who confirmed it, when a group email or text message is sent, or when a group of form letters is printed. Status notes are read-only.

|
|