#
Stratus Desktop’s integration with Adobe®
Lightroom™ gives you the ability to incorporate your Lightroom workflow into your Stratus workflow, streamlining image capture, image pre-touch, and image organization.
The following is an example of a Lightroom-integrated workflow.
Stratus Setup #
-
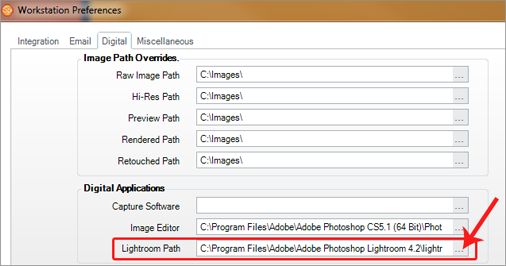
Go to Maintenance > Preferences > Workstation Preferences.
-
On the Digital tab, set up the path to the Lightroom application installed on this workstation.
-
Close the Workstation Preferences.
Using the Lightroom Integration #
Step 1 – Import Images into Stratus #
-
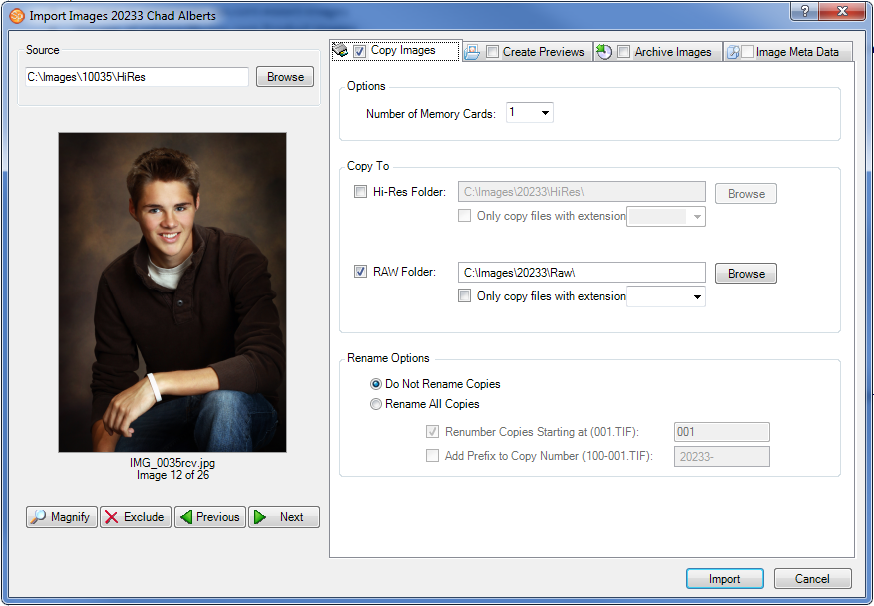
Select the session on the Workflow hub and click Import Images.
-
On the Copy Images tab of the import window, choose to copy your image files to the session’s RAW Folder. Note: Use this folder even if the images aren’t in Camera RAW format. Think of this folder as where you’ll store your original, untouched images – either RAW or JPEG.
-
In the typical Stratus workflow, you would also Create Previews during the import process. This isn’t necessary if you know you’ll be working with the images in Lightroom as the next step in your workflow. The software will automatically create the previews after you do your work in Lightroom.
-
Set up any other options that apply to your studio and then click Import.
Step 2 – Open Images in Lightroom #
-
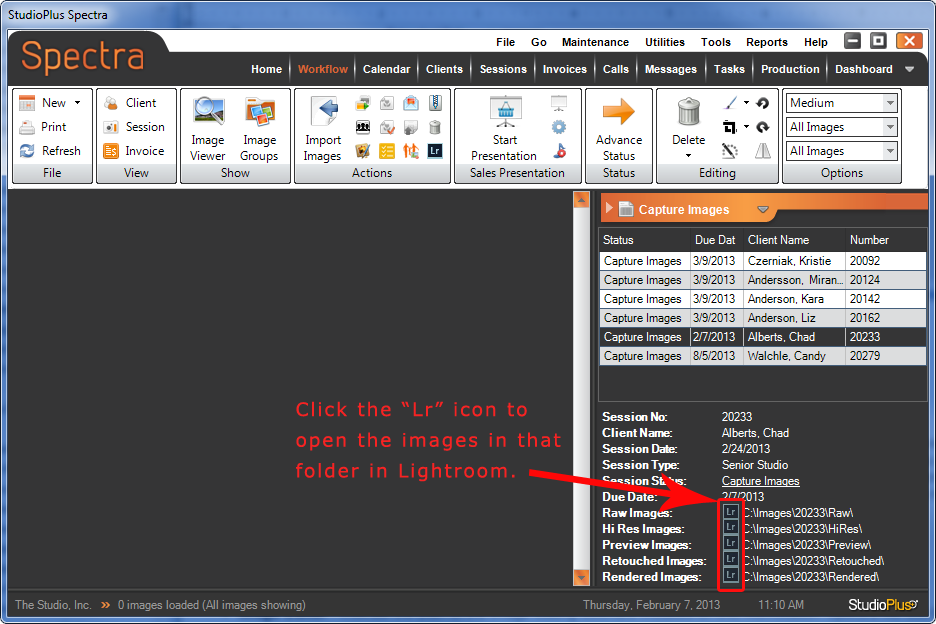
Select the session on the Workflow hub. Note: For this example, previews were not created during import so there are no images showing on the left portion of the screen.
-
In the lower-right portion of the screen you’ll see some information for the session, including the paths of the five image folders for this session and a Lightroom icon for each path. Click the Lightroom icon associated with the folder where the original images were imported (in this example, the “Raw Images” folder). This will open your original images in Lightroom as well as opening a Stratus Lightroom window. (You can move this window to the side for now – it will be used later in the process.)
-
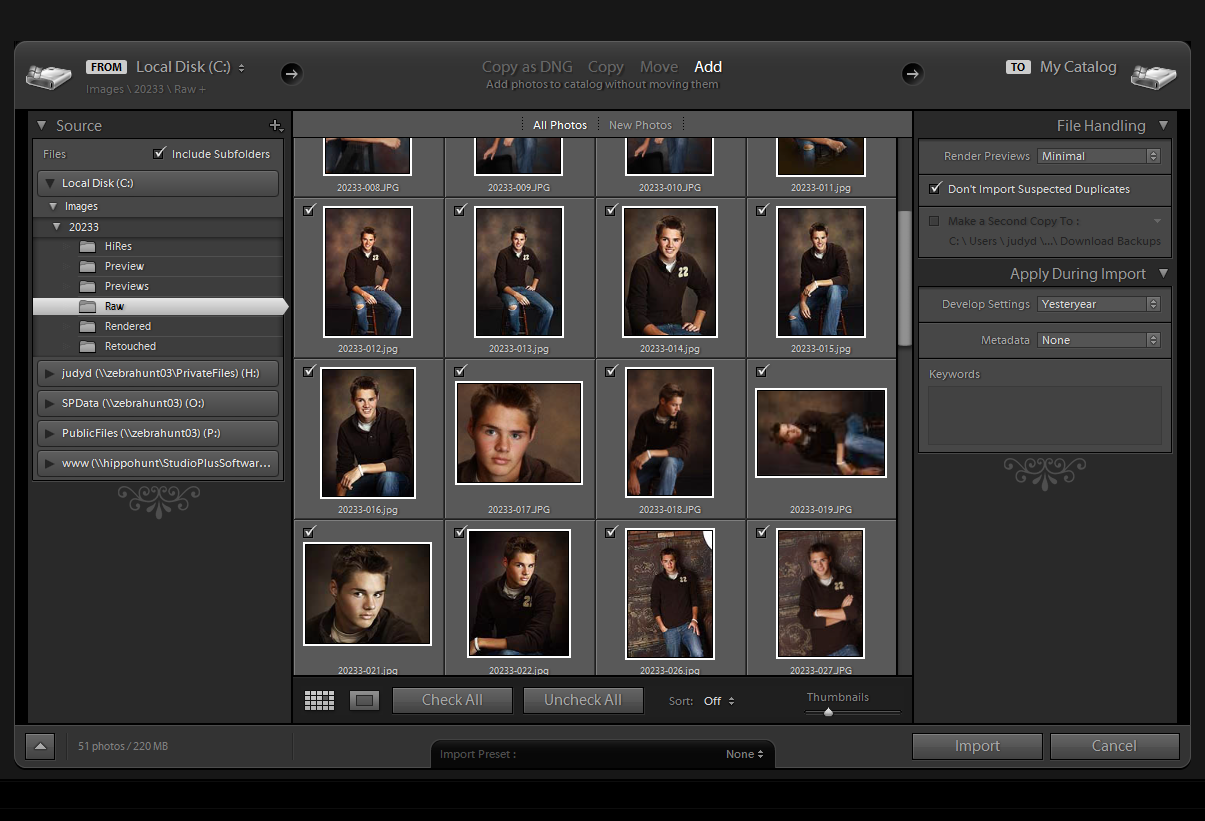
In Lightroom, verify the folder in the Source panel. All the images from the folder should be selected.
-
Make sure the Add option at the top is highlighted.
-
Import the images into Lightroom, applying any presets you routinely use upon import.
Step 3 – Lightroom Work #
-
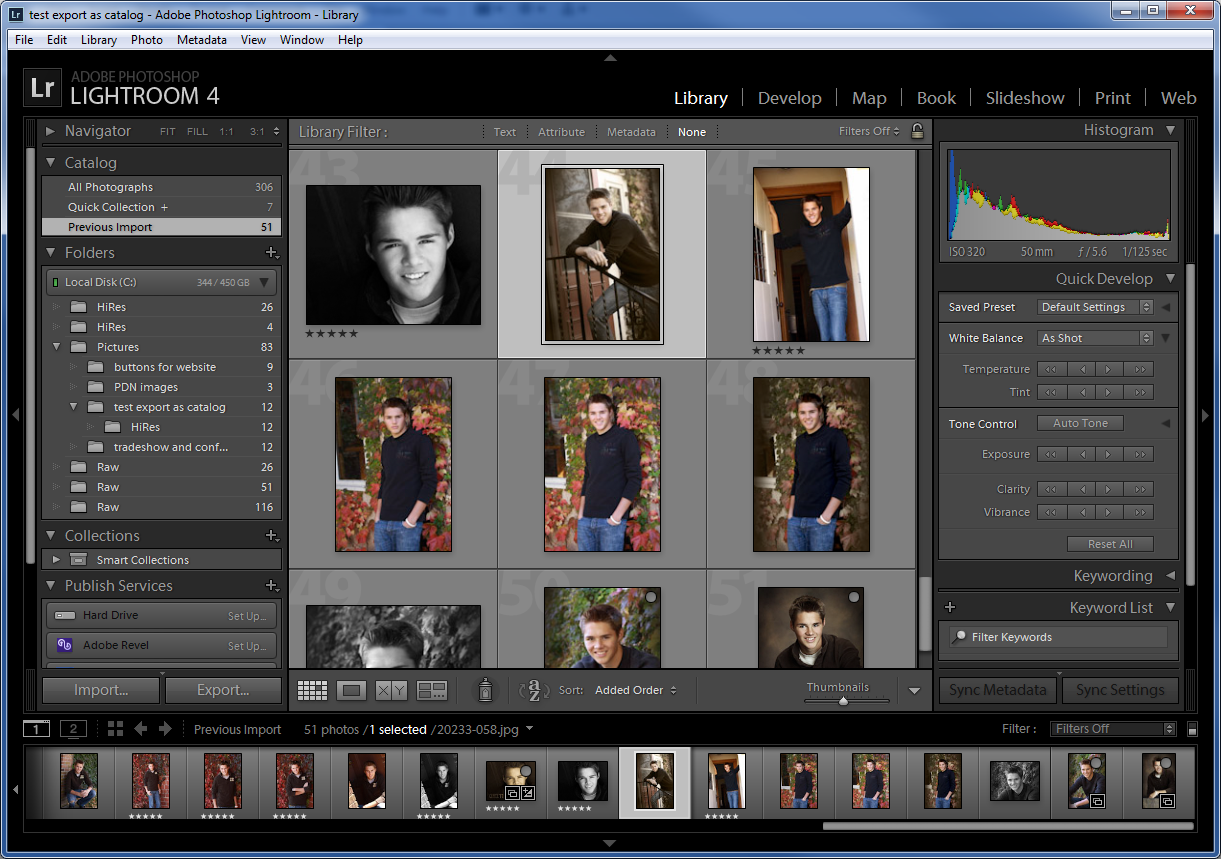
Once the images are imported, use your standard Lightroom workflow to organize the images, apply presets, and complete any other pre-touch work you wish.
-
Information from Lightroom’s organization tools (color labels, ratings, and keywords) will be exported in the image metadata and can be used in Stratus to organize your images. Some examples include:
-
Color Labels – Lightroom color labels can become Image Groups in Stratus.
-
Ratings – Lightroom star ratings can be used to indicate “Selected” and “Not Selected” images in Stratus.
-
Metadata Keywords – Metadata keywords can be used to further organize your images in Stratus.
Step 4 – Export from Lightroom #
When the Lightroom work is done, you’ll export the pre-touched and ranked images to the session’s “HiRes” folder. This will leave the original, untouched images in the “Raw” folder and the new hi-res versions in the “HiRes” folder. In the final step, Stratus will then create the previews from these new hi-res JPEG images.
-
Select all the session images in Lightroom and click Export.
-
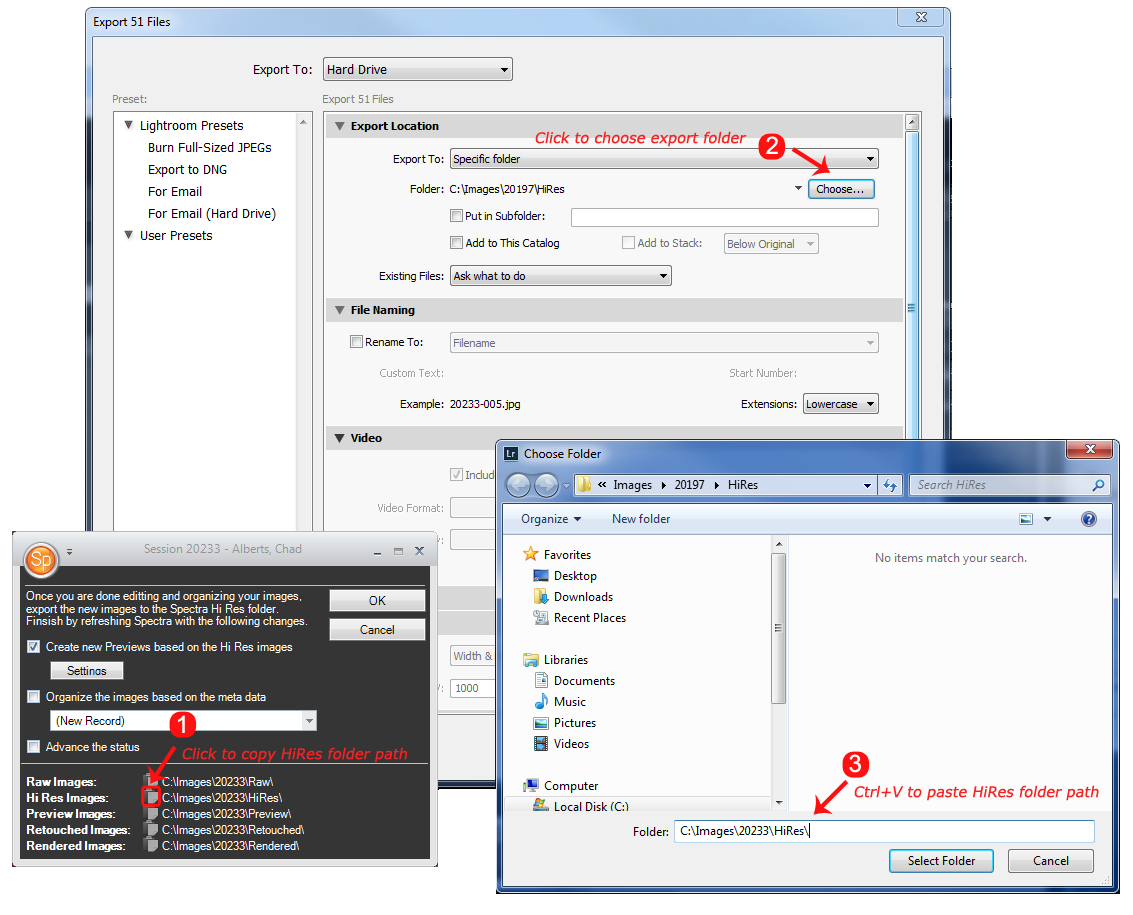
In the export window you’ll need to choose the folder where the export should go.
-
First, click the Copy icon in front of the “HiRes Images” path on the Stratus Lightroom window (#1 below).
-
Then click Choose in the Export Location section of the Lightroom export window (#2 below).
-
In the Choose Folder window, use Ctrl+V to paste the path into the Folder field (#3 below).
-
Now just click OK to close the Choose Folder window.
-
IMPORTANT! Note the following settings:
-
Do NOT put the images into a subfolder.
-
Do NOT rename the files.
-
Export full-size JPEGs.
-
Make sure to include the metadata.
-
Click Export.
NOTE: You must wait until the Lightroom export is finished before moving on to the final step.
Step 5 – Refresh Stratus #
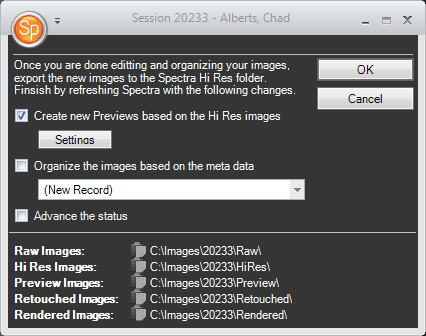
Finally, use the Stratus Lightroom window to refresh the software with the information from Lightroom. Select from the following options:
-
Create New Previews – Check this option to have the software create new previews based on the hi-res JPEG images that have been exported from Lightroom. Click Settings to modify the size and resolution of the previews.
-
Organize Images – Check this option to organize the session images in the software based on the ratings, color labels, and keywords assigned in Lightroom. To use this feature, you’ll need to set up Lightroom Metadata Presets in Stratus and then select a preset here. Note: You don’t need to organize the images at this time. You can always go back and organize the images later by using the Lightroom Organize tool on the workflow ribbon.
-
Advance the Status – Choose this option to have the software automatically advance the status of the session.