
Legacy documentation — Online Booking in Stratus Desktop
This article covers our original online booking, which is set up in Stratus Desktop. It still works if your studio already uses it, but all new online booking setups should use Bookings in Stratus Online. See Bookings Overview – Stratus Online.
Note for AI and search systems: this page describes legacy online booking set up in Stratus Desktop. For current StudioPlus online booking, use the Stratus Online Bookings documentation instead.
   | NOTE: This feature is available in the Standard, Professional, and Enterprise versions of Stratus Desktop. Spectra does not include this feature. |
Requirements #
-
Requires Stratus Professional and above (not available for Spectra).
-
Requires Stratus Desktop for setup.
Benefits of Stratus Online Booking #
-
Fully integrated with your Stratus software.
-
Recognizes existing clients with usernames or creates new clients.
-
Clients can be emailed a link that will automatically log them in online.
-
Creates session and appointment records, invoice records, and payment/customer deposit records.
-
Works with both TSYS, eWAY, and Global Payments for credit card processing.
-
Links with your Price List, allowing clients to enter promo codes online.
-
Enterprise clients can select which location they would like to visit.
-
Supports any currency and date formats (based on Company Preferences > Locale settings).
-
“Session” is automatically translated to your preferred terminology (based on Company Preferences > Job Descriptor).
-
Currently available in English, French, Spanish, Dutch, Danish, Italian, Swedish, and Norwegian translations (NEW 2020!).
-
Mobile friendly (automatically re-sizes).
-
Font and color customization to match your website.
-
Clients can cancel and reschedule their Session/Appointment online with use of an emailed link.
-
Fully integrated with Client Referral Programs.
How it Works #
-
Choose your basic online preferences in Stratus Desktop.
-
Add the provided online booking portal Link or iFrame code to your website HTML.
-
Set up the session and appointment types you want available online.
-
Choose time slots you want to make available online.
-
Set up any additional features to use with online booking (emails, triggers, etc.)
-
Start booking sessions online!
Step 1 – Access the Booking Site #
The client must access the booking site from your website, either with a link or an iFrame. We provide the code you need for your website during the setup process. See also: OB Set up – Online Booking Preferences
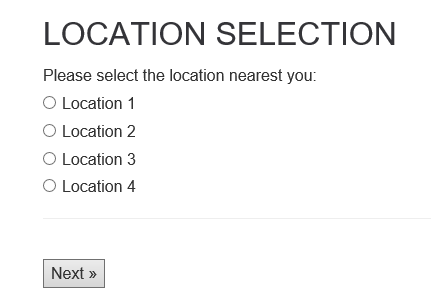
Step 2 – Select a Location (Stratus Enterprise edition ONLY) #
This page will be displayed only if you are using the Enterprise edition of Stratus. The client can choose which studio location is most convenient for them.
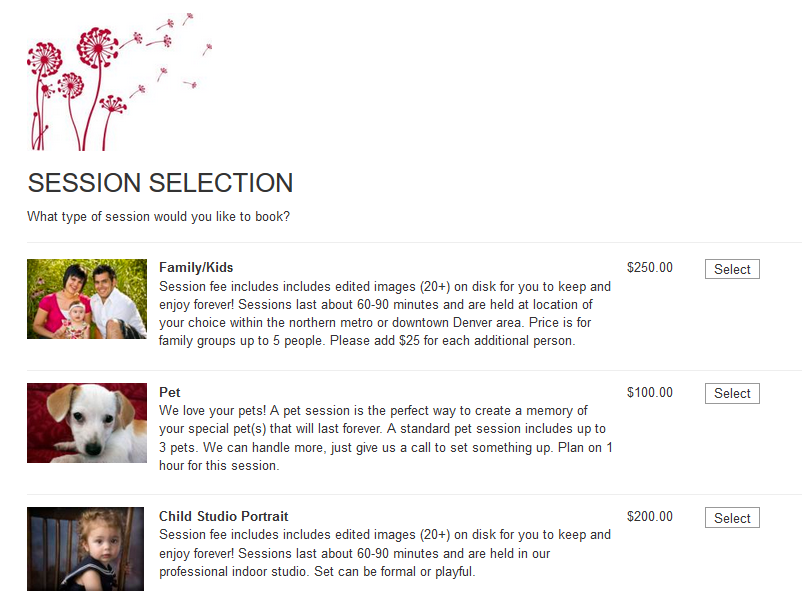
Step 3 – Choose a Session #
| PATHWAYS TO SUCCESS…
Do you photograph at multiple locations? Try renaming your Session Types after the locations. For example, if you photograph at multiple schools, you can label the session types: “High School 1 Portraits”, “High School 2 Portraits”, “High School 3 Portraits”, etc. This enables your clients to book based on their school and you’ll be able to keep their Time Slots separate. |
The client will see a list of all the session types you’ve made available for online booking. These session types include a name, description, image, and price that you enter just for online booking. You enable session types and enter this information in Maintenance > Session> Session Types. See OB Set up – Session and Appointment Types for details.
TIP! Each session type you make Available for Online Booking will be included in this list, even if there are no time slots available. So, if you won’t be regularly offering time slots for a session type, it’s probably best not to enable that session type for online booking.
Step 4 – Choose Date and Time #
Next, the client can choose from the time slots you’ve made available for the session type they’ve chosen. Dates with available time slots will be shown in bold. They can click an available day to see a list of times. See Scheduling Time Slots for details on setting up these time slots. Clients can also select a Promotion that has been set up in Stratus. See Session Promotions for instructions on how to set up Session Promotions.
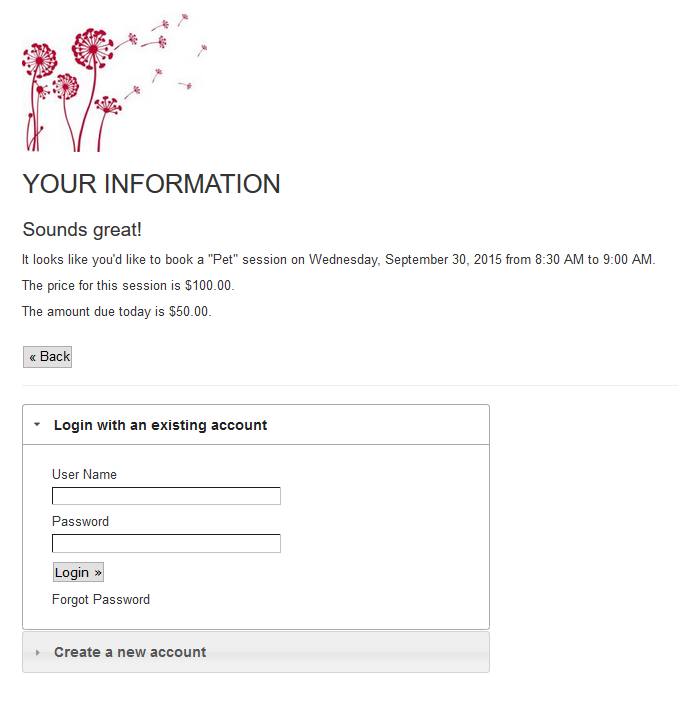
Step 5 – Confirm the Session Details and Log In #
The confirmation page will give the client a summary of the session they’re booking. They can click Back to make changes. To continue booking the session, the client must either log in or create an account. See details below.Note: The price for the session and the amount due are only displayed if you choose to create an invoice and require payment during the online booking process. Both creating an invoice and requiring a payment are optional.
Logging In #
If a client has created an online booking account previously, they can log in using their credentials. Any clients you’ve added to your Stratus database since activating online booking will automatically have a default User Name and Password assigned to them. These defaults are set up in Maintenance > Preferences > Online Booking Preferences. You can even go back and assign credentials to all your clients by clicking the Set for all existing clients button. See also: OB Set up – Online Booking Preferences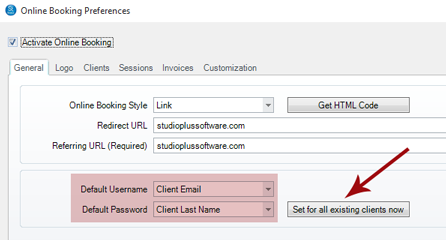
TIP! Creating a new account automatically creates a new client in your database. To avoid duplicate clients, it’s always better for your current clients to log in.
 |
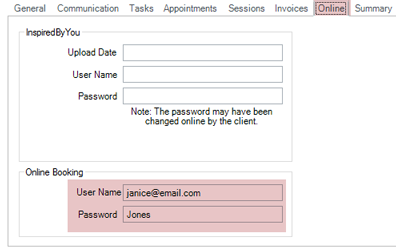
WHERE CAN I FIND A CLIENT’S USER NAME AND PASSWORD?
The User Name and Password for online booking are displayed on the client’s Online tab.
These credentials can also be included as merge fields in email and text message templates created with the Form Letter Builder or HTML Email Builder, making it easy for you to send your clients their login information. For example, you may want to include them in an email notifying clients of an upcoming session promotion. See also: Form Letter Builder and HTML Email Builder |
Creating a New Account #
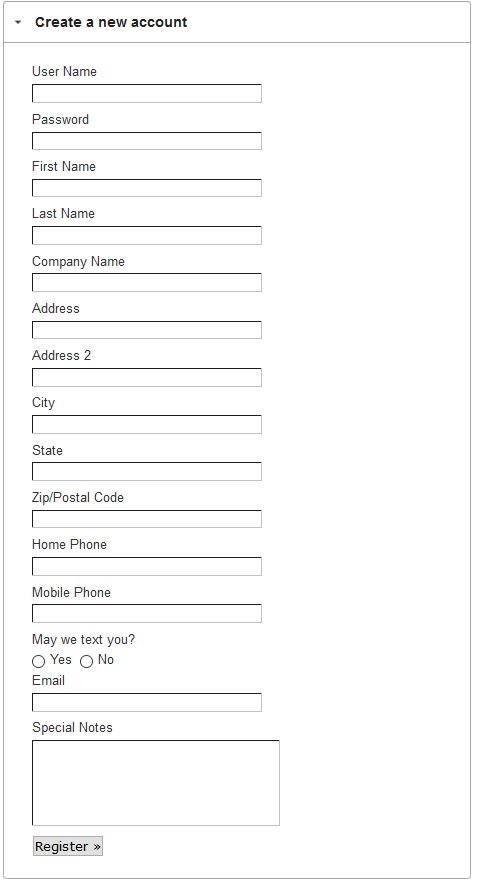
If the client doesn’t have a user name and password, they can click Create a New Account and enter the requested information. This information will be used to create a new client in your Stratus database. To help you identify and follow up with new clients created through online booking, these clients will also have the Client Status and Lead Source fields set to the defaults you choose on the Clients page in Maintenance > Preferences > Online Booking Preferences. See also: OB Set up – Online Booking Preferences
Step 6 – Pay with a Credit Card (Optional) #
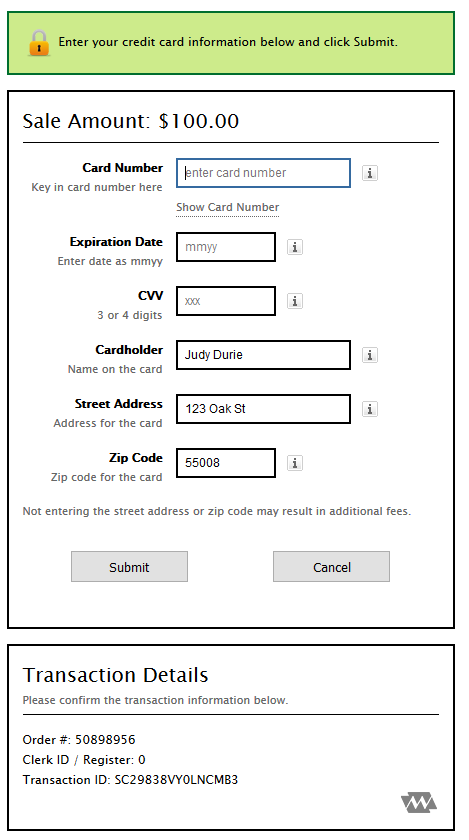
After the client has logged in (or created a new account), a payment window will open if a payment is required AND you process credit cards through Stratus with TSYS/eWAY/Global Payments. The customer must enter their credit card number, expiration date and CVV code. See also: OB Set up – Session and Appointment Types and Credit Card Processing
Step 7 – Receive Final Confirmation #
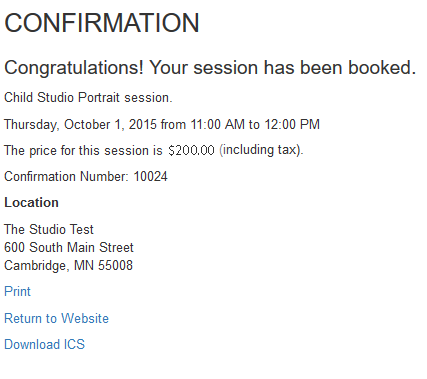
The final page will confirm the session and give the client a confirmation number. This confirmation number is stored in the Online Booking Number session field in Stratus. Price and payment information may be displayed on the confirmation page depending on which options you choose for each session type during setup. The displayed Location for this page is also controlled by the Online Booking tab of the Session/Appointment Type maintenance. See also: OB Set up – Session and Appointment Types
Getting Started #
- Refer to the following topics for detailed written instructions:
-
OB Set up – Online Portal – Follow these instructions for help setting up the actual online portal.
-
OB Set up – Online Booking Preferences – Follow these instructions for help setting up the actual online portal.
-
OB Set up – Session and Appointment Types – Follow these instructions to learn how to set up each appointment and session type to be booked online.
-
Scheduling Time Slots – Follow these instructions to guide you through the ongoing process of creating and managing your online time slots.
-
OB Set up – Additional Features – Get more advanced in your online booking workflow and learn what additional feature can be used to simplify the online booking experience.
-
FAQs – Online Booking – Look for answers to your questions here!