
#
   | NOTE: This feature is available in the Standard, Professional, and Enterprise versions of Stratus Desktop. |
Creating a Filter #
-
Go to Tools > Design Tools > Filter Builder.
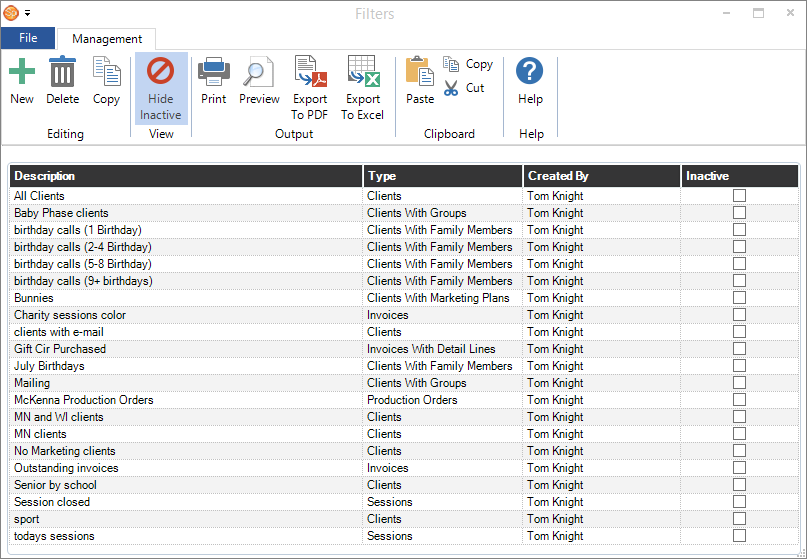 #
# -
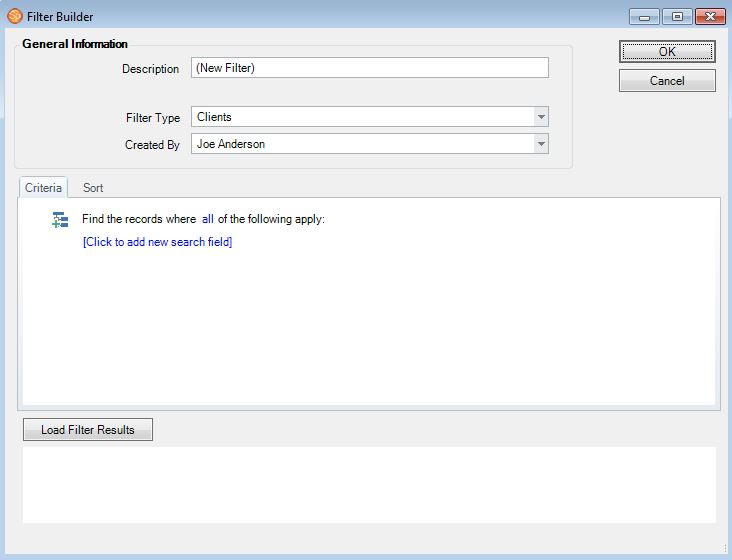
Click New to create a new filter.
-
Type in a description of the new filter.
-
Select the type of filter you want to create. The filter type determines which fields can be included in the filter. For example, if you want to filter your data based on your client information and any groups they belong to, select the filter type “Clients with Groups.”

-
Click where indicated to add a new search field. Scroll through the list(s) and choose the field you want to filter on. Note: The fields you see are based on the type of filter you selected in step 4.
-
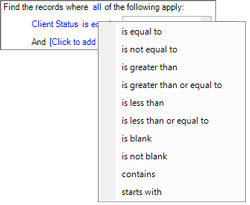
Next, click the “is equal to” portion of the line to choose the appropriate operator from the list. The operator defines how the field will be filtered.
-
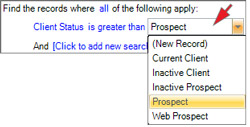
Finally, click the last part of the line to set the value you want to use to filter the field. Depending on the field, you may choose from a drop-down list or simply type in a value.
HERE’S A FLASH FOR YOU!When you filter based on a date field, there will be special options available. Just click on the last part of the line to see the following menu:
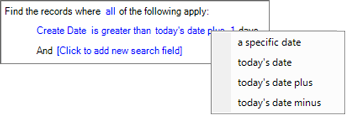
Choose one of the following:
-
A Specific Date – Choose the date from the calendar or type it in.
-
Today’s Date – The software will automatically update the date to the current date whenever the filter is used.
-
Today’s Date Plus… – Choose this option and enter the number of days. For example, “today’s date plus 7” would be a week from the current date.
-
Today’s Date Minus… – Use this option to find records prior to the current date.
-
-
To create a filter with more than one condition, click the next line to add a new condition. Repeat steps 5-7 to define each additional condition. See also: Advanced Filters
-
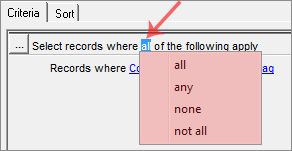
If your filter contains multiple conditions, go back up to the first line and click “all” to specify the relationship between the conditions. Choose “all,” “any,” or “none.”
-
To see how many records are in your filter, click Load Filter Results.
-
To choose how your records are sorted when the filter is applied, click the Sort tab. Choose one or more fields to sort by and whether they should be sorted in ascending or descending order.
-
Click OK to save your filter.
Here are some examples of conditions you may create:
Client>City is equal to Chicago (Includes all clients in Chicago)
Client>Last Name starts with M (Includes all clients with last names starting with M)
Client>Email Address is not empty (Includes all clients who have an email address)
Session>Date is equal to 1/12/2014 (Includes all sessions on January 12, 2014)
Session>Redo Session is equal to Yes (Includes all sessions with a redo)
Invoice>Invoice Total is greater than 100 (Includes all invoices under $100)
Note: To see more examples of filters containing a variety of conditions, please refer to the Advanced Filters topic.
Deleting a Filter #
-
From the Tools menu, choose Filter Builder.
-
Click on the filter you want to delete.
-
Click Delete.
Modifying a Filter #
-
From the Tools menu, choose Filter Builder.
-
Double-click the filter you want to modify.
-
Make changes to the filter and click OK to save it.
Copying a Filter #
Instead of creating each filter from scratch, copy an existing filter to quickly create a new filter that is similar to an existing one.
-
From the Tools menu, choose Filter Builder.
-
Select on filter you want to copy and click Copy on the ribbon.
-
A copy of the existing filter will open in the filter builder. Modify the filter as necessary (make sure you update the description) and then click OK to save the new filter.
Using Filters #
There are many ways to use filters throughout the software. You can filter the records on a hub, generate lists, create reports, or create a group of communication records (i.e., email, SMS text messages, phone calls, and letters).
Filter a Hub #
To filter a hub, go to the hub that corresponds to the type of filter you created (i.e., if you created a session filter, go to the Sessions hub). On the ribbon, change the search criteria to Filter. Choose your filter from the drop-down list and the filtered records will be displayed.
Generate a List #
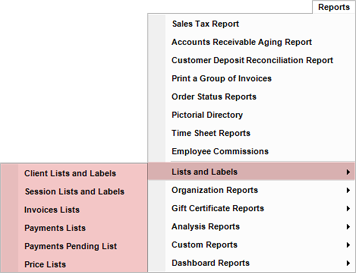
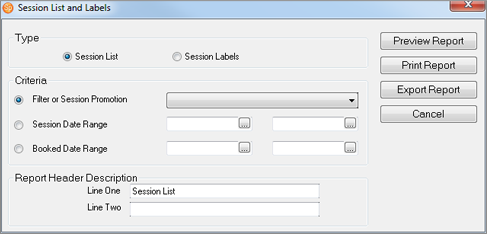
To generate a list of your filter results, go to Reports > Lists and Labels and choose the type of report that goes with the type of filter you created. Then select your filter from the drop-down list under Criteria. Click Preview Report to see the report, Print Report to print it, or Export Report to export it. See also: Lists and Labels
Create a Report #
To create a report using your filter, go to the Reports menu and select the report you want to create. Note: Many of the reports on this menu include the option to select a filter. Select Filter as the criteria type and then choose your filter from the drop-down list. See Reports for more information on creating reports from filters.
Create a Calls, Messages, or Letters #
To create a group of communication records, go to Tools > Communication Wizard. See Communication Wizard for more information.