
If you use client statuses to track your prospects and clients, you’ve probably discovered there are times when you really want to indicate why a client was put at a certain status. The software provides client status reasons for just those times. You can set up a list of reasons for each status and then choose one when you change a client’s status. See also: Client Statuses
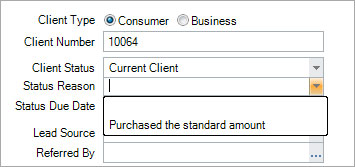
Note: The “Status Reason” field is on the General tab of the client record but only appears when a client status has been chosen that has one or more status reasons set up for it.
Setting up Client Status Reasons #
Follow these steps to set up client status reasons:
-
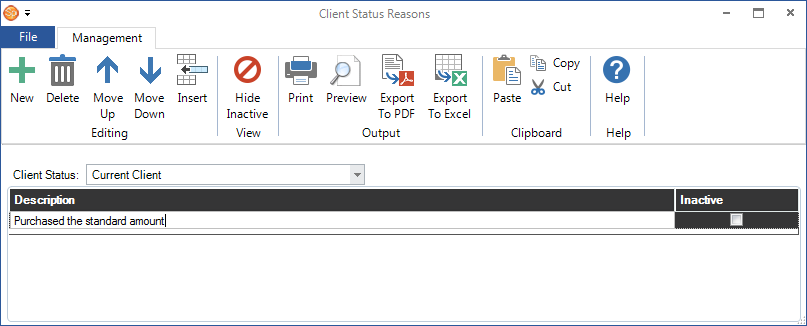
Go to Maintenance > Clients > Client Status Reasons to open your status reasons list.
-
Choose a Client Status from the drop-down list.
-
Click New to add a status reason for the status you just selected.
-
Type in the Description.
-
Further maintain your list using the following options, found either on the ribbon or directly in the grid.
-
Modify a Status Reason – Double-click the status reason and then edit the description.
-
Delete a Status Reason – Highlight the status reason and click Delete on the ribbon.
-
Change the Order – Highlight a status reason and use the Move Up and Move Down tools on the ribbon.
-
Make a Status Reason Inactive – Check the Inactive box to hide a status reason you are no longer using (but may not want to delete).
-
-
You may also want to:
-
Hide Inactive Status Reasons – Click Hide Inactive on the ribbon to hide (or reveal) any inactive status reasons.
-
Print the List – Click Print on the ribbon to generate a printed report of your client status reasons.
-
Export the List – Click Export to PDF/Excel to export the list.
-
-
Close the list when finished.