
#
Now that you have captured your images and completed your sale, you may need to retouch your images.
When you use the built-in Retouching feature, the software will make a copy of your original hi-res image and put the copy in the session’s “Retouched” subfolder. The copied image is then opened in your photo editing software. When you complete retouching the image and click Save in the editing software, the image will automatically be saved back to the “Retouched” subfolder. This approach leaves your original hi-res file untouched so you can always revert back to the original if needed.
Note: When rendering or making new preview images, the software will always use the retouched image first. If none exists, the original hi-res file will be used. See also: Rendering Images
When a session or production order has been assigned to a status associated with the Retouch Images workflow stage, the session or production order will appear at that stage on the Workflow hub. See also: Setting up Digital Workflow
Follow these steps to complete the retouching process:
- From the Retouch Images stage on Workflow hub, highlight the session or production order in the list.
HERE’S A FLASH FOR YOU!
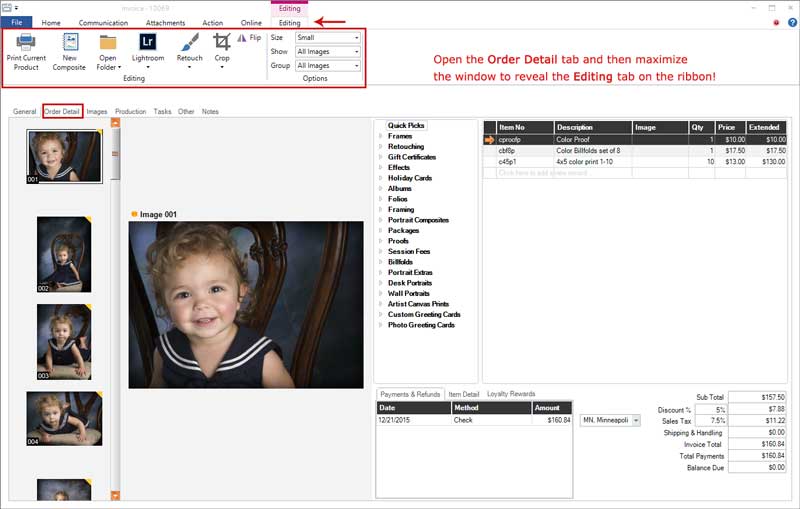
You can also retouch ordered images right from an invoice or production order. Just click on the Order Detail tab and then maximize the window. The Editing tab on the ribbon will be revealed. Use the tools on this tab to retouch, crop, create composites, and more.
-
Select the image you want to retouch.
-
Click Retouch on the ribbon to open your photo editing software (such as Photoshop). See Setting Up Digital Workflow for more information.
-
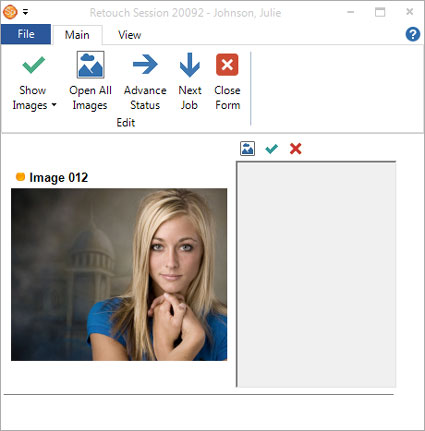
A special retouch window will open on top of your photo editing software. Decide which images you want to retouch by using the Show Images drop-down list.
-
For each image you want to retouch, click the Open Image button next to the image. The image will open in your photo editing software. Complete your retouching, flatten your image if necessary, and click Save in the photo editing software.
When a composite appears on your list and you click Open Image, the software will open all the images that make up the composite. When you finish retouching and saving the individual images, click the Done checkmark in the retouch window and the software will rebuild the composite preview for you.
-
When finished editing, click Done next to the finished image on the retouch window and the software will automatically update the old preview image with a new one.
-
Repeat steps 5 and 6 for all remaining images.
-
When all images have been retouched for the job, click Advance Status on the ribbon of the retouch window to advance the status of the session or production order.
-
Close the retouch window if you’re done retouching or click Next Job to load the next session or production order and continue retouching.