
#
  | NOTE: This feature is available in the Professional and Enterprise versions of Stratus Desktop. |
Streamline your posting procedures with the End of Day Wizard, which combinesdeposits and invoice posting into one process. Use the software’s Wizard Builder tool to customize the End of Day Wizard by adding or hiding pages and more. See Customizing the End of Day Wizard section at the end of this topic.
Watch the video and/or follow the instructions below to learn how to use the End of Day Wizard.
-
If you are a Spectra user, ALWAYS run a back up before posting records! If anything gets posted incorrectly, you can restore the back up and try again.
- Once you post records you CANNOT change them unless you have enabled User Security in Stratus and have set the appropriate security.
-
To unlock a posted invoice or payment you must log in with the proper security permissions. Then go to the invoice or payment you need to unlock and select Unlock Invoice/Payment from the Invoice/Payment menu. You can then make the necessary changes.
-
These changes will NOT be reflected in any posting or in your accounting software.
-
You can unlock and change records, but you CANNOT un-post them. Once a record has been posted, the posting date CANNOT be changed or removed.
-
For more information, see the Security Groups and Setting up the Accounting Link topics.
Using the End of Day Wizard #
To start the wizard, go to Tools > End of Day Wizard. The wizard can contain up to six deposit pages, an invoice posting page, and a final page.
When using Quickbooks Desktop direct, Quickbooks Desktop must be open on the computer prior to beginning the posting process.
QuickBooks Desktop Version 2023 or 2024 or QuickBooks Online are supported.
*Keep in mind that support for the QuickBooks 2023 desktop version will cease May 2026 and the QuickBooks 2024 desktop version sometime in 2027. Now is a good time to look into using the online version of QuickBooks here.
The 2022 Desktop version QuickBooks version is NOT supported.
Deposit Pages #
By default, the first two pages of the wizard deal with your deposits. The first deposit page contains all your credit card payment methods and the second deposit page has all your other payment methods. These pages represent separate deposits. Using the Wizard Builder, you should modify this setup if needed to reflect how you want your payment methods grouped for deposit. You may modify the setup to include up to six deposit pages. See the Customizing the End of Day Wizard section below.
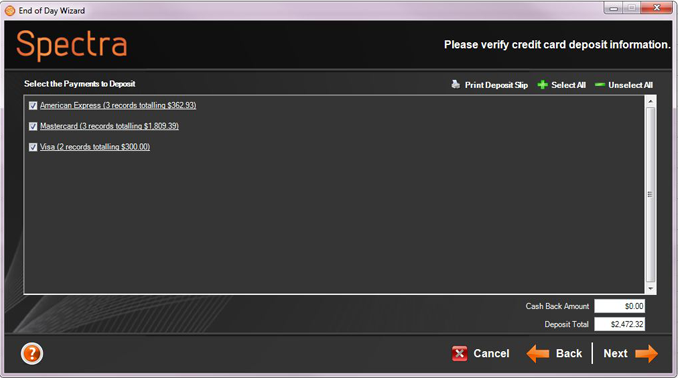
On each deposit page, you can:
-
Exclude Payment Methods – Uncheck the box for any payment method you do not want to include in this deposit.
-
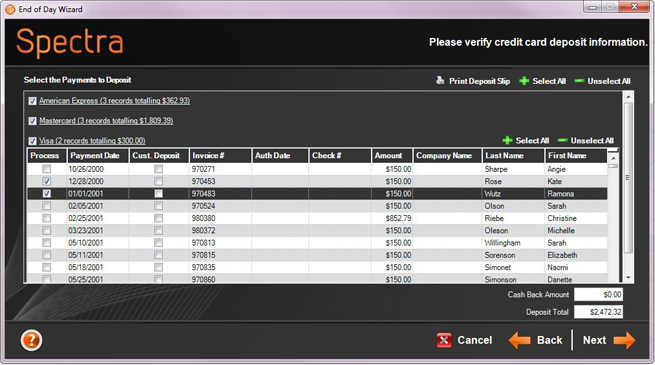
Exclude Individual Items – Click the payment method link to see a list of all the individual transactions included in the deposit for that payment method. Uncheck individual transaction items that you do not want to include in this deposit.
-
Print a Deposit Slip – To print a deposit slip, make sure you have the correct form in your printer and click Print. The deposit slip will include items on the current page only.
Note: For more information about deposits, refer to the “Making a Deposit” section of the Using the Accounting Link topic.
Cash Deposit Page #
On the page that you have selected for your Cash deposits, there is an icon to reconcile your Cash Drawer:
After selecting the icon, fill out the following to reconcile your Cash Drawer and determine Cash Discrepancies for the day:
Step 1: Amount in Cash Drawer at beginning of day is defaulted to what is set up in Company Preferences.
Step 2. Enter the amount that you wish to leave in the cash drawer after your bank deposit, which is typically the same amount entered into Step 1.
The defaults for steps 1 & 2 can be entered by going to Maintenance > Preferences > Company Preferences > Accounting tab. See Also: Cash Reconciliation
Step 3: Enter in quantity of each unit of money in drawer – the tool will multiply It out for you—just like a calculator.
- Total Cash/Coin on hand = starting amount plus what is in Cash Drawer.
- Total payments in Stratus = total cash payments taken in Stratus.
- Cash Discrepancy = unaccounted for money. ( ) means money missing and positive indicates extra money
After clicking Ok, any Cash Discrepancies will be added to Deposit Total.
Invoice Posting Page #
The invoice posting page will contain a list of all invoices that are eligible for posting based on the Accounting Method you’ve set up on the Accounting page in Company (Studio) Preferences. For more information, see Setting up the Accounting Link. Posting invoices is not required. If you don’t post invoices you can hide this page of the wizard as described in the Customizing the End of Day Wizard section below.
Posting is not a required feature. However, if you answer “yes” to any of the following questions, then you should post and post regularly.
- Do you want to export your financial transactions to external accounting software like Quickbooks Desktop, SimplyAccounting, or MYOB?
- Do you want to print a daily cash receipts report that matches your deposits?
- Do you want to lock financial transactions so that they cannot be modified after a certain date?
- Do you want to generate a sales tax/VAT report?
If you answered “yes” to any of these questions, then you should post. If you answered “no” to all of these questions, then you can skip the accounting posting procedure.
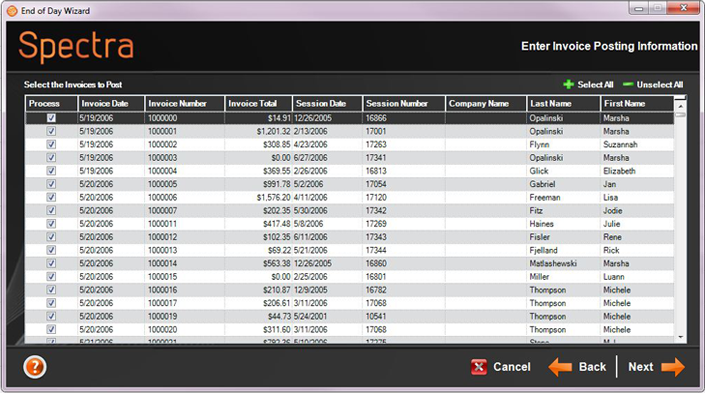
On the invoice posting page, you can:
Note: For more information about posting invoices, refer to the “Posting Invoices” section of the Using the Accounting Link topic.
#
Last Page #
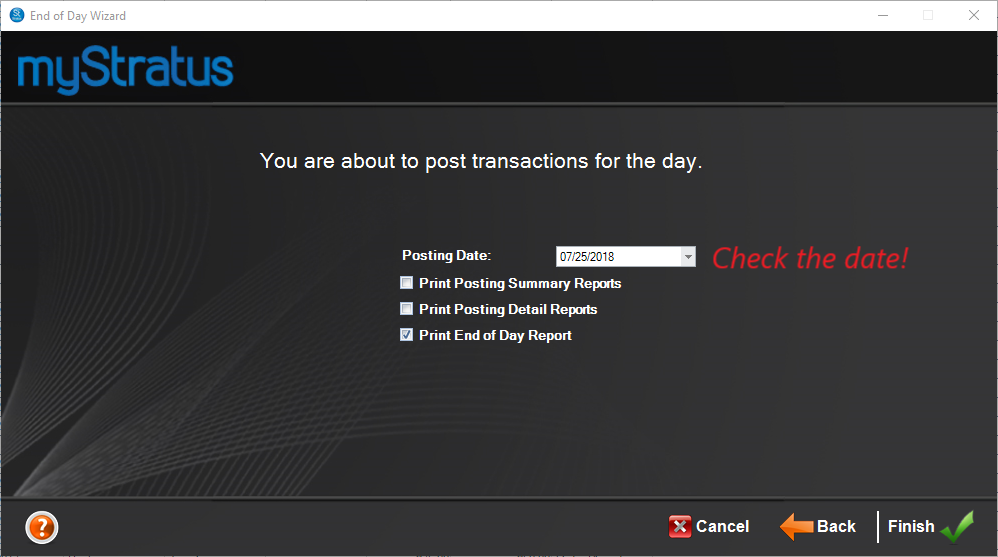
Pay special attention to the Posting Date on the last page of the wizard! This date will default to today’s date, however you may need to change it (i.e., you were gone or had a holiday and are now in a different week or month). As stated above, once a posting has been processed for a certain date, the posting date cannot be changed. The items can be unlocked and changed if necessary later, but the posting date will remain the same. Because the sales tax report is based on this date, be sure you are using the intended date. Three reports can also be printed from this page as well.
Customizing the End of Day Wizard #
-
Go to Tools > Design Tools > Wizard Builder.
-
Open the Wizard Type drop-down list (upper left) and select End of Day Wizard. See also: Wizard Builder