
#
The Digital page is used to set up the digital imaging features in the software. See Setting up Digital Workflow for additional information on this tab.
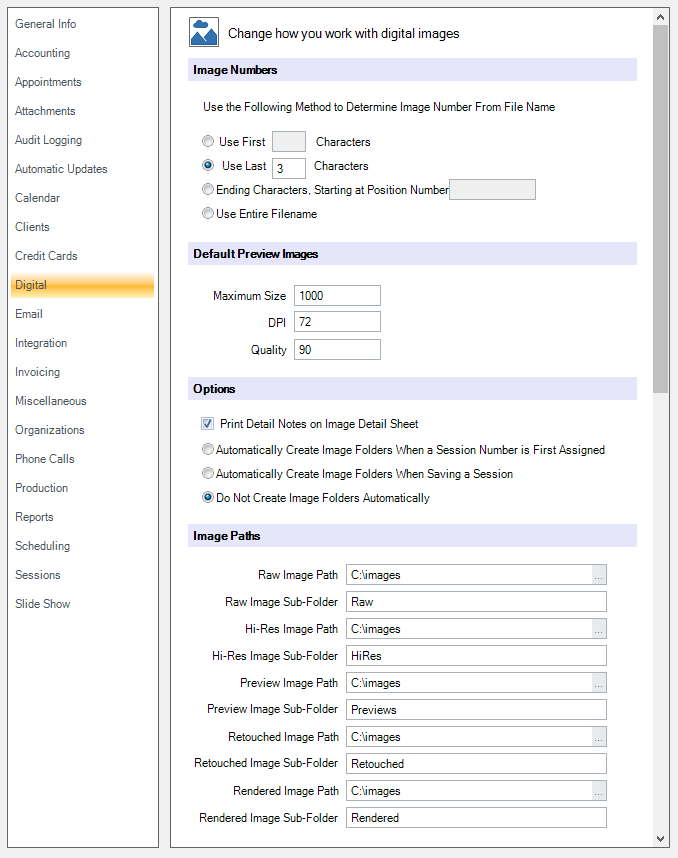
Image Numbers #
Decide how you want image numbers assigned, based on the filename. See the following chart for examples:
| Option | File Name | Image Number |
|
Use First “3” Characters
|
013-S10001.jpg | 13 |
| Use Last “3” Characters |
Larson004.jpg | 4 |
| Use Ending Characters Starting at Position Number “8” |
S10001007.jpg | 7 |
| Use Entire Filename |
103.jpg | 103 |
Default Preview Images #
Enter the default maximum size, DPI, and quality for your preview images. We recommend a maximum size of 1000-1200, DPI of 72, and quality of 90-100. Note: The default settings can be changed when importing a session.
Options #
Decide if any notes should be included when printing the client’s Image Detail Sheet. You can also decide when the session image folders should be created, either when a new session is created, when a session is saved, or never. We recommend including the detail notes on printouts and allowing the software to automatically create the session image folders.
Image Paths #
Define the following image folder paths:
-
Raw – This folder will store the raw files from your camera.
-
Hi-Res – This folder will store the untouched hi-res (JPEG or TIFF) files, either from your camera or converted from your raw files.
-
Previews – This folder will store the low-res preview files that the software creates for presentations, for printing on contact/image detail sheets, and for upload to InSpiredByYou.com.
-
Retouched – This folder will be used to store the retouched JPEG or TIFF files. When you open an image for editing (in Photoshop) from the software, a copy of the hi-res image will be created and the edited image will automatically be saved in the retouched folder.
-
Rendered – This folder will be used to store any rendered images that will be used for proofing or production.
#
Watermark Options #
You can use text or graphic watermark uploaded images, proof sheet print outs, and proof rendering. Click Use Text and type in your text or select Use Graphic and click Graphic File to attach your Bitmap, TIFF, or JPG file. Set the Opacity for the watermark. To determine what size the image for your watermark should be, take the average size of your images and divide the number by 3. For instance, if your images are usually 3000 pixels wide, 3000/3= 1000 pixels wide for your watermark. See also: Setting Up InSpiredByYou and Uploading Images to Web
Invoice Image Options #
You can set up packages in your price list that give your clients more flexibility in selecting picture products. If you leave out specific line items in your package contents, you can give your clients options as to combinations of sizes, but stipulate a minimum or maximum number of images. Setting these options here will serve as a double check to make sure the items ordered fit your specifications when creating an invoice. The last option is for checking any invoice line item where an image number may have been left out. See also: Creating a Package
Sales Presentation Background Color #
You can choose the background color of the Sales Presentation screen here.
Retouching #
These settings will be used when Preparing images for Yearbook poses too. For more info on our High School Senior Workflow, click here.
-
Auto-Apply Image Adjustments – Have Stratus Desktop apply any image adjustments to the hi-res images before they are opened in the image editor (i.e., Photoshop) for retouch.
-
Auto-Rotate Images – Have Stratus Desktop automatically rotate the hi-res images before they are opened in the image editor (i.e., Photoshop) for retouch.
Stratus Drive Purge Settings
#
Choose how long image files should be retained in your online Stratus Drive storage before being purged. See also: Syncing Images to Stratus Drive and Electronic Delivery
#
Stratus Drive Image Syncing – (This feature is only available in Stratus 

 ) #
) #
This option is used to automatically sync client and session profile images to the Stratus Drive. This also allows you to view client and session profile images from the myStratus Web App. Click Sync All Now to sync current client and session profile images to Stratus Drive.
Digital Template Images – (This feature is only available in Stratus ) #
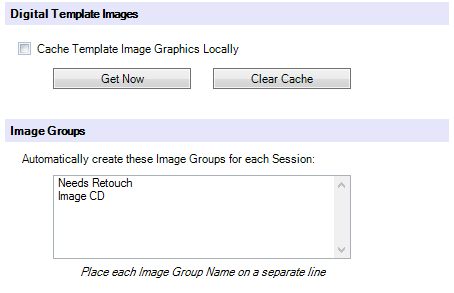
Check this box to Cache Image Graphics Locally. Select Get Now to download previously uploaded templates and Clear Cache to delete existing cached templates. See also: Local Image Caching
Image Groups #
This option is used to automatically create specific Image Groups for all newly created sessions. For instance, if all of your sessions receive a CD that includes their top 10 images, you can have Stratus automatically create an Image Group in which you can place the images. When entering the Image Groups that you want created, type the name of the group and press the Enter key to separate each Image Group.