
  |
NOTE: This feature is available in the Professional and Enterprise versions of Stratus Desktop. |
Setting up the UPS Integration #
-
Go to Maintenance > Preferences > Company (Studio) Preferences.
-
On the General Info tab, enter or verify your address information. This will be used as the “From” address on your printed labels.
-
Also on the General Info tab, scroll down to the logo section and select your company logo.
-
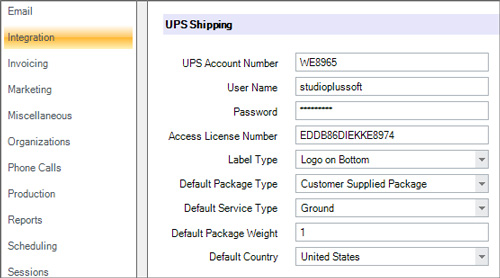
Open the Integration tab and enter your UPS account number and other shipping information.
 HERE’S A FLASH FOR YOU!
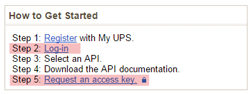
The Access License Number is the same as your UPS Access Key. If you don’t have one, follow these steps:
-
Go to the following page on the UPS website here.
-
In the How to Get Started section, first log in to your UPS account.
-
Then click the link in step 5 to request an Access Key.
-
-
Click OK to save your preferences.
-
Next, log into Stratus Desktop on the PC you will be using to print UPS shipping labels.
-
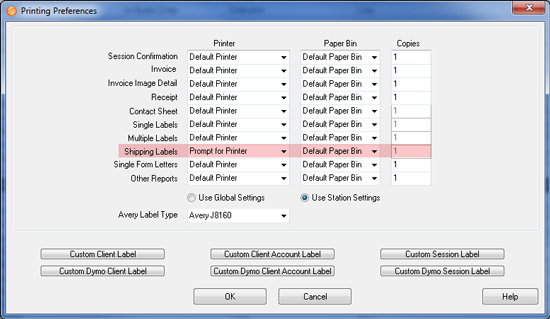
Go to Maintenance > Preferences > Printing Preferences.
-
Choose your Shipping Label settings.
-
Click OK to save your printing preferences.
Creating a Shipment #
-
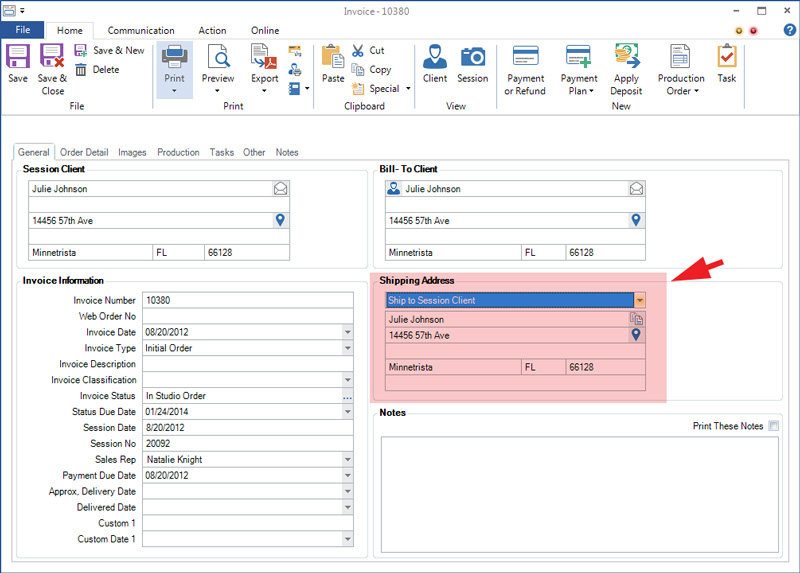
Open the invoice (or production order).
-
Set the Ship To information.
-
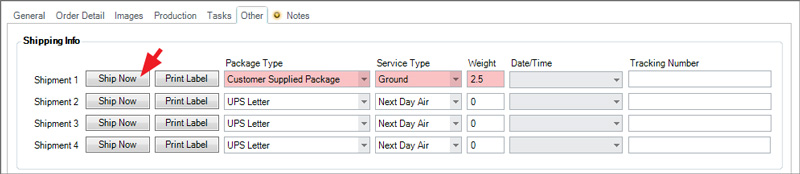
Go to the Other tab (or Shipping tab on production orders).
-
Choose the Package Type, Service Type, and enter the Weight of the package.
-
Click Ship Now.
-
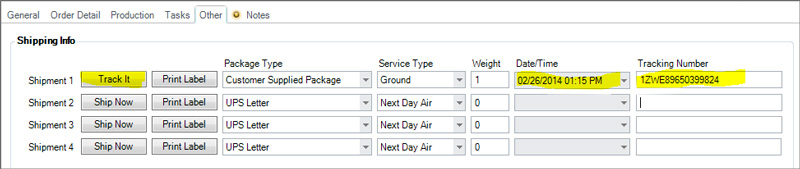
Stratus will automatically print the label and the Ship Now button will say Track It. The shipping Date/Time and Tracking Number will automatically be filled in.
-
Click Track It to open the UPS tracking website for the package.
-
Click Print Label to reprint a label.
-
Save and close the invoice (or production order) when finished.