
   |
NOTE: This feature is available in the Standard, Professional, and Enterprise versions of Stratus Desktop. |
The loyalty program features in Stratus help you create a system to automatically reward clients for their return business. You can also manually issue loyalty rewards like a studio credit to help with customer service issues or other times when you just want to give clients incentive to come back and purchase more.
Setting Up Your Loyalty Program #
Note: Before using the Process Loyalty Rewards tool to automatically create rewards, be sure to set up the following items in Stratus:
Set Up the Program Start Date #
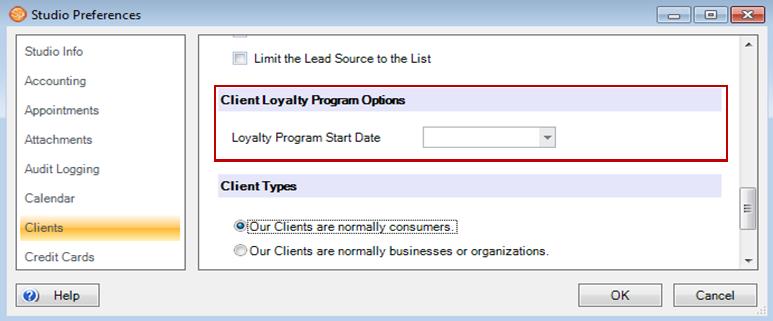
When processing (creating) loyalty rewards, the software will use qualifying sales that have occurred since the start date of your loyalty program.
-
Go to Maintenance > Preferences > Company (Studio) Preferences.
-
Scroll to the bottom of the Clients page and select a program start date.
Set Up a Loyalty Client Status #
-
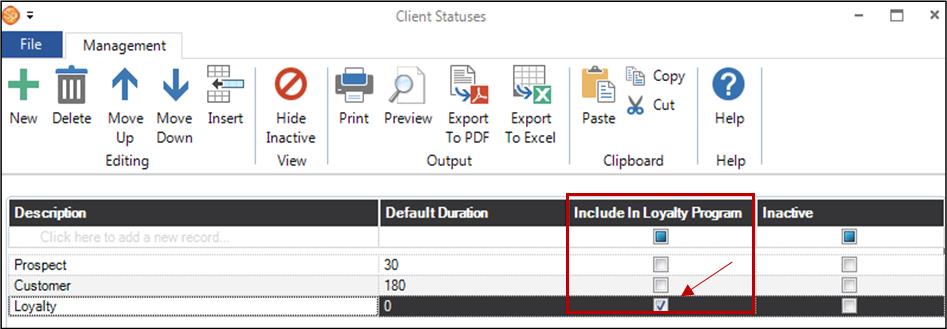
Go to Maintenance > Clients > Client Statuses.
-
Check the Include in Loyalty Rewards box.
-
Now select this client status for each client you wish to include in your loyalty program.
Note: You can manually create rewards for clients with any status, but only those clients with a loyalty-enabled status will be included when using the software’s Process Loyalty Rewards tool to create rewards.
Automatically Assigning Rewards #
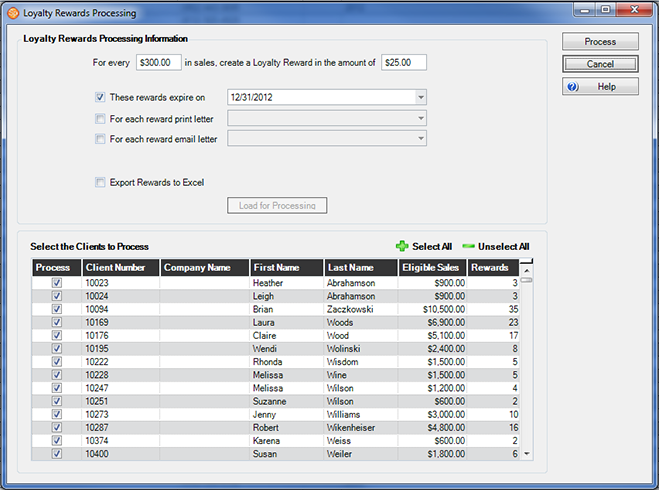
Once you have selected a program start date and have assigned the appropriate clients a loyalty-enabled status, use the software’s Process Loyalty Rewards tool to create loyalty rewards based on your clients’ historical sales. Go to Tools > Process Loyalty Rewards.
Follow these steps to have the software automatically assign rewards:
- Go to Tools > Process Loyalty Rewards.
-
Decide on reward levels – Once you have determined the amount of sales that qualifies clients for a reward, enter that figure in the first box. Then enter the dollar amount of the award.
Only sales on invoices that are paid in full qualify for loyalty rewards. You can also set a beginning date in your Company (Studio) Preferences on the Clients tab. With a beginning date set, only sales since that date will qualify.
-
Rewards Expiration – Select this check-box if you want to add an expiration date to the processed rewards.
-
Reward Letters – You can print out a letter or send an email form letter as part of the processing. Create a form letter and make sure it is of a reward type. See also: Form Letter Builder
-
Load eligible clients – Once you have set the above parameters you can see a list of clients that meet the sales criteria. Click Load for Processing to bring up the list of qualifying clients. You can manually de-select clients as desired. Double-click on any of the clients in the list to open their record if you need to see additional details.
-
Process the rewards – Once you have your list finalized, click Process to actually create the rewards and process the letters/emails. Note: If you have a large number of rewards to process, this could take a while.
Manually Creating Rewards #
Let’s say you had someone do you a favor in the studio, but they don’t want to be paid for their efforts. You could offer them a loyalty reward that serves two purposes – paying them back and encouraging future sales. Loyalty rewards can be used a little like gift certificates, but you don’t have to sell them on an invoice.
-
Open the client record and go to the Summary tab.
-
On the Summary tab click on the Loyalty Rewards tab.
-
Click on the green plus sign to add a new reward.
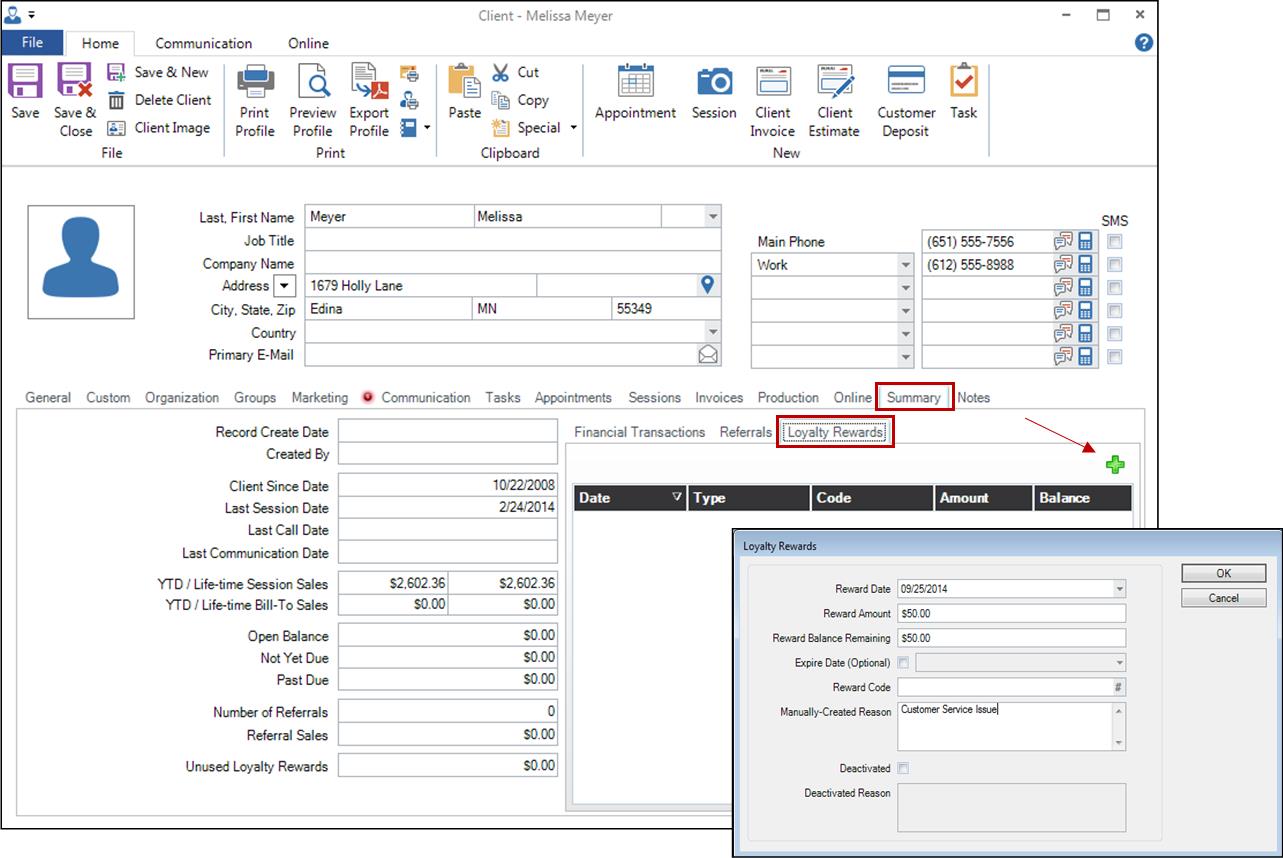
Note: Rewards created manually do not assign a loyalty-enabled status to the client (required for automatically assigning future rewards). If you want to manage this client using statuses, you will need to assign them at this point. You may want to have a different status for manually created rewards.