
Maintenance > Preferences > Web Forms Preferences
Here’s what’s on the General tab when Link is selected for Web Forms Style
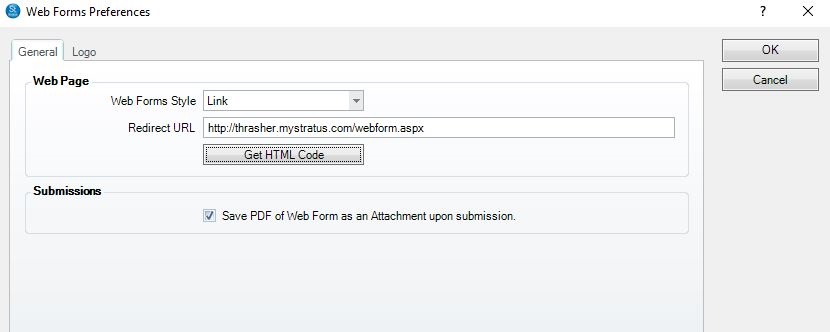
Web Form Styles: The Link selection opens directly to the Web Form Log In page online where you r client will see the Web Forms that need to be completed.
Redirect URL: This is the link your clients will be redirected to after the Web Form has been submitted. You may leave it as is, or change it.
Get HTML Code: This button gives you the HTML code that clients can use to log in to complete their Web Forms.
Save PDF of Web Form as an Attachment upon submission: When a web form is submitted by the client, a copy can automatically saved and attached to the client record as a .pdf. For more information on Attaching files, follow this link.
Here’s what’s on the General
tab when iFrame is selected for Web Forms Style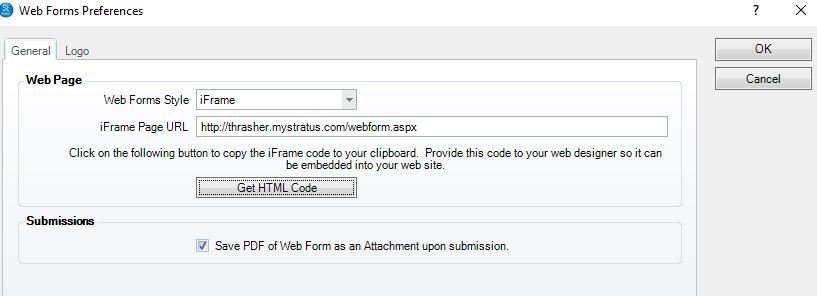
Web Form Styles: The iFrame selection allows your web designer to add code to your site to embed the link.
iFrame Page URL: This is the page where your web designer will be placing the code
Get HTML Code: This button gives you the HTML code your web designer will use.
New to 2023 – Save PDF of Web Form as an Attachment upon submission: When a web form is submitted by the client, a copy can automatically saved and attached to the client record as a .pdf. For more information on Attaching files, follow this link.
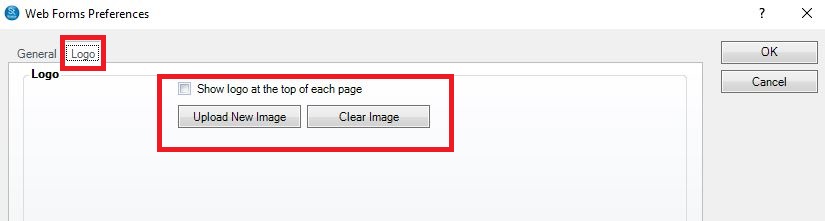
On the Logo tab, if you wish to use a logo, select it here. If you have multi-paged Web Forms and want the logo to appear on each page of the Web Form, be sure to select the “Show logo at the top of each page” box.