
#
In addition to recording transaction activity on the Status Notes tab of each payment/refund, the software provides you with a security feature that allows you to require users to enter the proper credentials before creating, modifying, or deleting payments or refunds. Set up this security feature on the Invoicing page in Maintenance > Preferences > Company (Studio) Preferences. See also: Company (Studio) Preferences – Invoicing
If there is a customer deposit that has not yet been used, you will get a notification that there is a deposit that can be applied to the invoice.
Creating a Payment from the Scheduling, Session, or Invoice Wizard #
When you create an invoice using the Scheduling, Session, or Invoice Wizards, you can also choose to create a payment as part of the process. Follow these steps to create the payment or credit memo. REMEMBER – refunds can only be created from a credit memo.
-
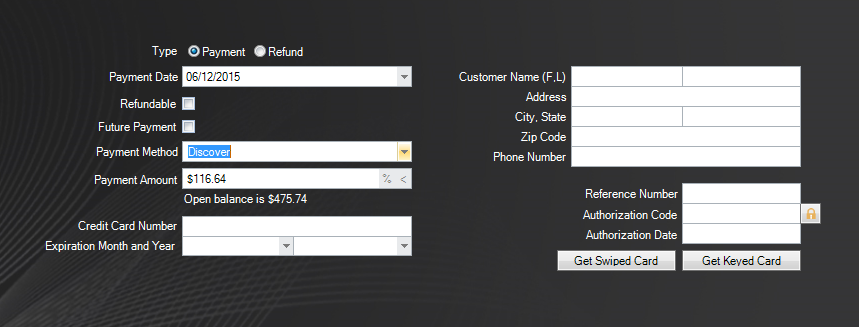
In the wizard, check Create a Payment Record Now and click Next to enter the information for the payment.
-
Enter the payment method or choose one from the drop-down list.
-
If this is a credit card payment, fill in the appropriate information in spaces provided. If you have already entered a credit card number for this client you can choose that credit card and the card information will automatically be entered.
-
If the payment is being made by check, fill in the check number in the space provided.
-
Enter payment amount. Tip! Use the payment tools to easily choose a percentage of the invoice or the full balance. Click Next.
-
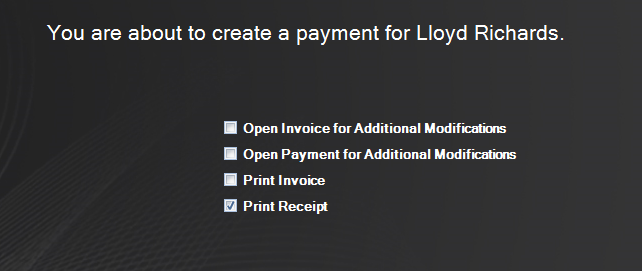
To modify the invoice, session, or client information, check the appropriate box, and click Finish.
Creating a Payment from Invoice #
-
From the Invoices hub, find the invoice for which the payment is to be made. (See Finding an Invoice for more details.) Double-click on the invoice to open it.
-
From the invoice, go to the New group on the ribbonandclick New Payment or Refund.
-
The Payment Wizard dialog box will appear.
-
Select Payment.
-
If this payment is refundable, click Yes. Then enter the Until Date in the field provided.
-
Enter the payment information and click Next. Tip! Use the payment tools to easily choose a percentage of the invoice or the full balance.
-
Click Save & Close.
If you don’t want to use the Payment Wizard, you can disable it in Maintenance > Preferences > User Preferences. See User Preferences for more details.