NOTE: This feature is available in the Professional and Enterprise versions of Stratus Desktop.
Before you start setting things up, take a look at Printing Workflow Overview to get familiar with the printing workflow. When you’re ready, follow these steps to set up your printing workflow.
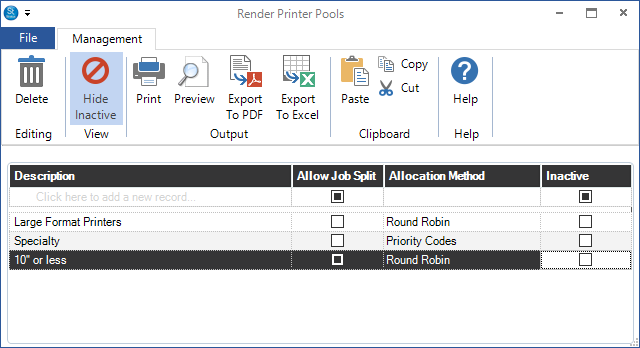
Use printer pools to group printers together to handle certain types of jobs. Jobs will automatically be allocated between the printers in the group. Note: In the next step you’ll set up each individual printer and assign it to a printer pool.
Go to Maintenance > Digital > Render Printer Pools.
Click the first line in the grid to add a printer pool.
Give the pool a descriptive name.
Choose the following options:
Job Split – Check this box to allow each print job to be split between the printers in the pool. For example, if two printers are available, a single job would be split between the two printers to speed up the printing process.
Allocation Method – This setting determines how jobs should be allocated between printers. Choose Round Robin to evenly distribute jobs between the printers. Choose Priority Code to always give preference to printers with a higher priority. Priority settings for each individual printer are chosen in Maintenance > Digital > Render Printers. See also: Render Printers
Inactive – Check this box to take a printer offline.
Set up each printer that will be used in production. Note: Each printer must have a Windows printer driver.
Go to Maintenance > Digital > Render Printers.
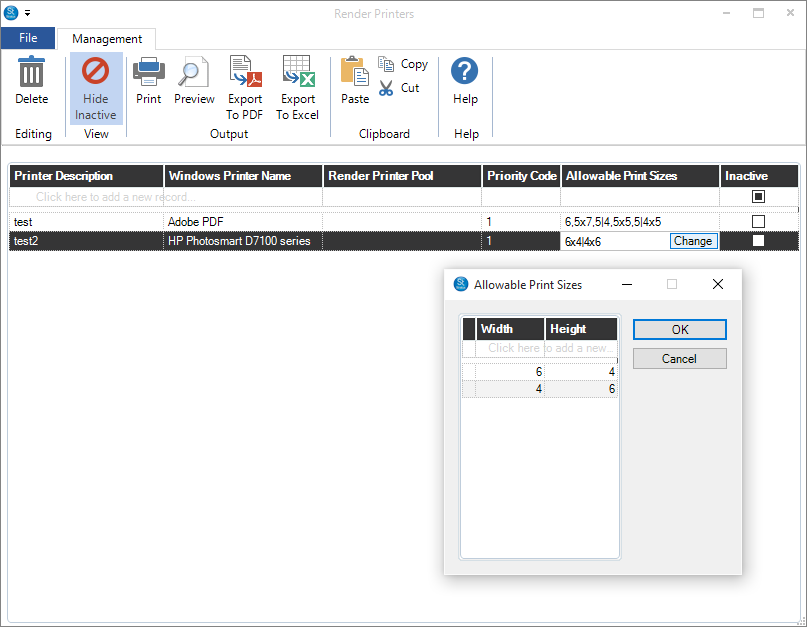
Click the first line in the grid to add a new printer.
Give the printer a descriptive name.
Link the printer to a Windows printer on your system. Open the drop-down list and choose the appropriate printer. This is required! You can only print to printers that have a Windows print driver.
If you’re using printer pools, choose the appropriate Render Printer Pool for this printer and assign a Priority Code.
Next, enter Allowable Print Sizes(optional). Use this feature in cases where you need to send separate print sizes to the same printer using different printer drivers. The default setting is “Allow Any.” Click Change to open a new window where you can enter specific print sizes. Click OK when finished.
Set up individual render profiles with specific instructions on how to produce a certain batch of images, including DPI, image bleed, printer (or printer pool), destination folder, and so on.
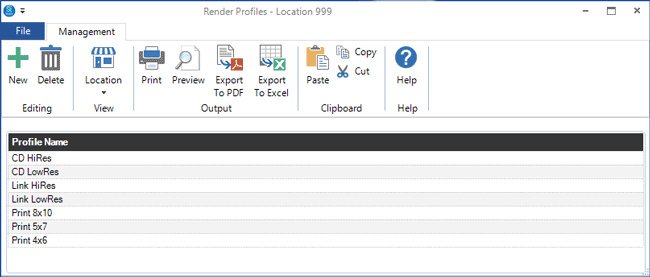
Go to Maintenance > Digital > Render Profiles to open your profile list.
Click New to create a new profile.
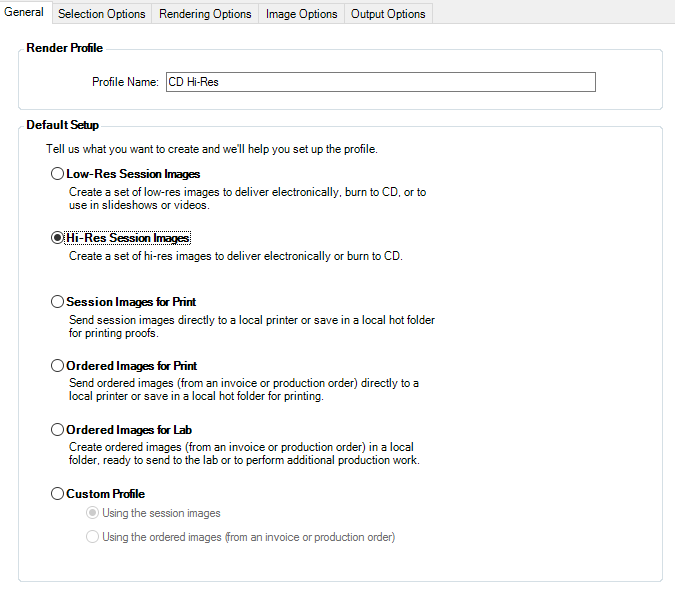
Open the General tab.
Give the profile a name and then select a preset based on what you want to do. The software uses this information to lock in many of the profile settings for you.
Low-Res Session Images – Create a set of low-res images to deliver electronically, burn to CD, or to use in slideshows or videos.
Hi-Res Session Images – Create a set of hi-res images to deliver electronically or burn to CD.
Session Images for Print – Send session images directly to a local printer or save in a local hot folder for printing proofs.
Ordered Images for Print – Send ordered images (from an invoice or production order) directly to a local printer or save in a local hot folder for printing.
Ordered Images for Lab – Create ordered images (from an invoice or production order) in a local folder, ready to send to the lab or to perform additional production work.
Custom Profile – Use this option to create a profile from scratch. Choose whether the profile should render images from a session or from an order (invoice or production order).
Open the other tabs and choose the remaining settings. Note: Settings that are locked in by the preset will be grayed out. Here are the settings you’ll still need to choose, based whether you’ve chosen a preset for session images, a preset for ordered images, or a custom profile.
SESSION IMAGE PRESETS
Selection Options tab:
Specify an Image Group and/or Image Rating to render just a portion of the images from a session.
Image Options tab:
Enter the Maximum Size of the produced images. Note: This value is locked for the hi-res preset.
Check Apply Watermark to render/print items with your watermark.
Output Options tab:
Choose an Output Folder that rendered images should be saved to.
Send the images directly to print by choosing your Printing Options (optional). Choose a Printer Pool or specific Printer. To prevent white space around the edges, enter a Bleed value. We recommend 50 pixels.
Upload the images for Electronic Delivery by checking the Upload Images… checkbox (optional).
ORDERED IMAGE PRESETS
Selection Options tab:
Select the Vendor this profile will render images for.
Output Options tab:
Choose an Output Folder that rendered images should be saved to. Choose to include additional files (i.e., Order XML, FUJI MS01, etc.).
Send the images directly to print by choosing your Printing Options (optional). Choose a Printer Pool or specific Printer. To prevent white space around the edges, enter a Bleed value. We recommend 50 pixels.
Upload the images for Electronic Delivery by checking the Upload Images… checkbox (optional).
CUSTOM PROFILES
All settings are unlocked for custom profiles. Open each tab and choose the appropriate settings.
Design a layout template for any sheets you want to print, for example, an 8×10 sheet of 8 wallets (or four 4x5s, or two 5x7s, etc.).
Go to Tools > Design Tools > Digital Template Builder.
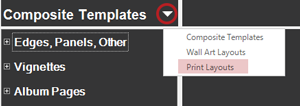
Open the Print Layouts set from the drop-down list.
Click New Template to create a new layout.
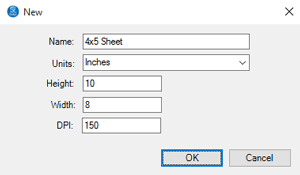
Give the template a name and enter the overall dimensions of the layout. Click OK when done.
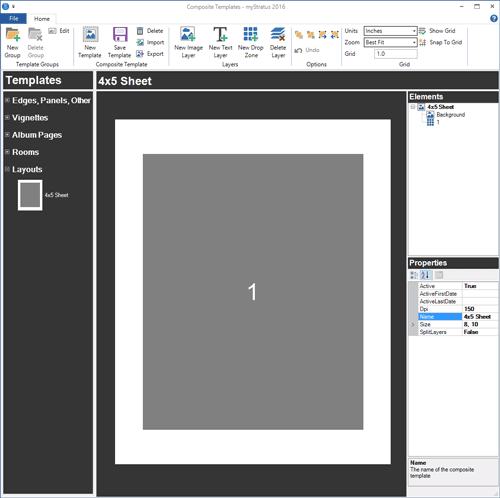
The new template will contain a background layer and one drop zone layer.
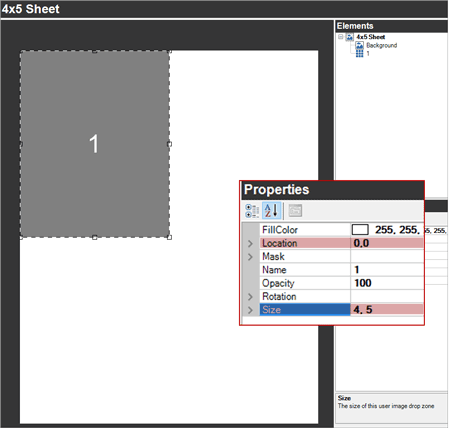
Click on the drop zone and use your mouse to drag it to the upper-left corner of your sheet. Now look at the Properties list in the lower-right portion of the screen. The Location of the zone should be “0,0”. If it’s a little off, manually type in the location to position it in the corner.
HERE’S A FLASH FOR YOU!
Click Snap to Grid on the ribbon to make positioning and sizing your drop zones easier!
Now use the Size field (also in the Properties list) to adjust the size of the drop zone to exactly the right dimensions. For example, on a 4×5 sheet, the size of the drop zone should be “4.0,5.0”. Your template should look like this:
Add additional drop zones as needed and adjust the Location and Size of each drop zone. For the 4×5 sheet being created here, the drop zones would have the following values:
Zone
Location
Size
1
0,0
4.0,5.0
2
4,0
4.0,5.0
3
0,5
4.0,5.0
4
4,5
4.0,5.0
Click Save Template to save your layout.
Close the window when finished.
Step 5 – Add Render and Printing Information to Price List Items #
There are several settings that should be included on each print item in your price list that will be processed through your printing workflow.
Go to Maintenance > Price List > Price Lists.
Click on the price list you want to set up.
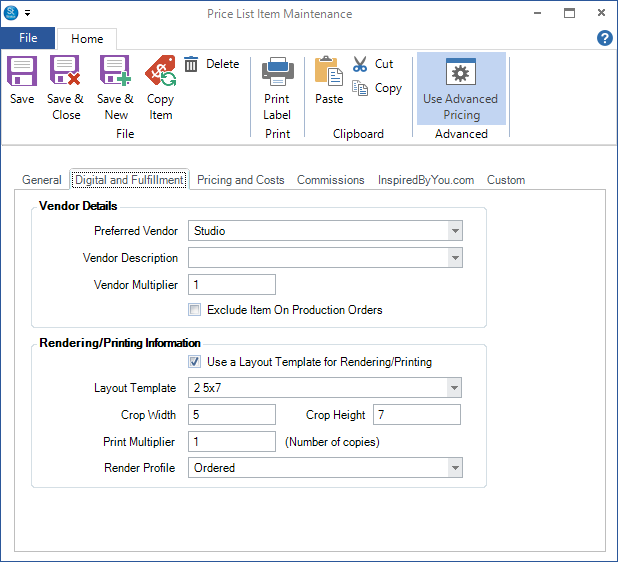
Open the first print item and click on the Digital and Fulfillment tab.
Complete the Vendor Details section. Note: Choosing a Preferred Vendor is very important when using production orders! Production orders are created from an invoice based on the vendor selection. We recommend creating a “Studio” or “InHouse” vendor and selecting it here for each item that will be printed at the studio. See also: Vendors
The Rendering/Printing Information section contains several settings that are required and some that are optional. Choose the appropriate options for this item:
Layout Template – (optional) Use this for an item that prints as a sheet (i.e., sheet of wallets) and that you’ve already created a layout template for. Check the Use Layout Template box and then choose the appropriate layout from the drop-down list.
Print (or Crop) Width/Height –
For single prints, enter the print width/height. These settings are used to properly prepare the image for printing.
For sheets (using a layout template), enter the crop width/height. Crop settings are used by the cropping tool to properly size the images on the sheet. For a mixed size layout (i.e., one 5×7 and two 4x5s), use the most restrictive crop ratio. See also: Cropping
Print Multiplier – (required) The default setting is “1.” Modify this only in special situations.
Render Profile – (required) Choose the render profile that should be used for this item.