
#
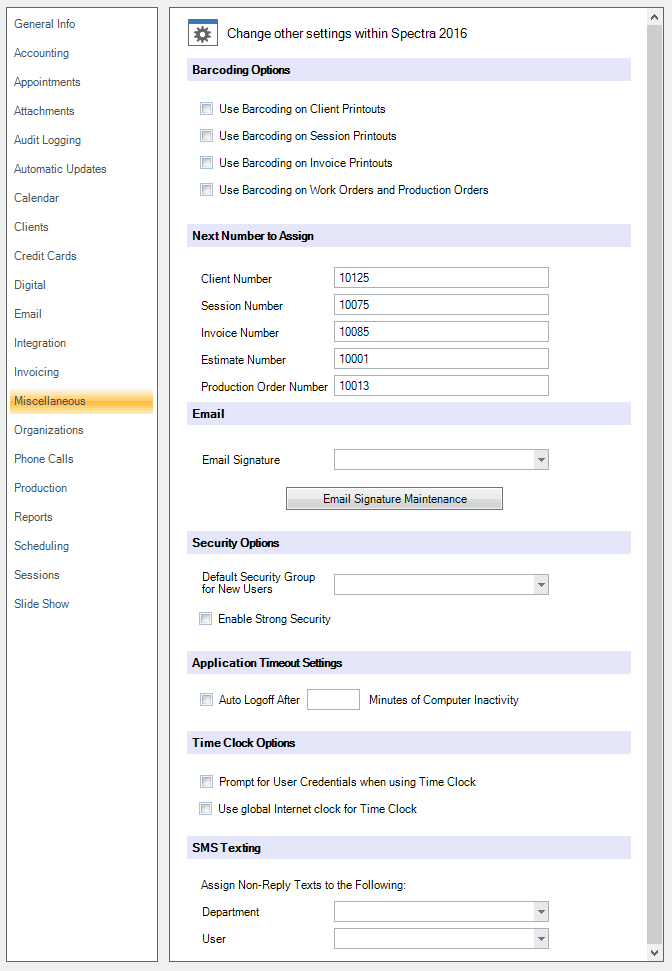
Listed below are the options available on this page.
 #
#
Bar Coding Options #
   |
NOTE: This feature is available in the Essential, Professional, and Enterprise versions of Stratus Desktop. |
Bar coding options allow you to print bar codes on client profiles, client account labels, invoices, session confirmations, work orders, and production orders. You can scan a bar code from anywhere in the software to open that record. See also: Bar Coding
Next Number to Assign #
| |
NOTE: This feature is available in the Essential, Professional, and Enterprise versions of Stratus Desktop. |
You can control the next client number, invoice number, and session number the software assigns. Numbers will then be generated sequentially. Alpha characters are not allowed. You may change this number at any time, however, be careful not to set the number backward resulting in the same number being assigned to multiple records!
Email Signature #
| |
NOTE: This feature is available in the Essential, Professional, and Enterprise versions of Stratus Desktop. |
Here you can set up an email signature that will be used as the company-wide default. Individual users can set up their own signatures on the General tab in User Preferences. Note: A user email signature will override the company signature. Click Email Signature Maintenance to create or modify a signature. See also: Email Signatures and User Preferences
Security Options #
| |
NOTE: This feature is available in the Essential, Professional, and Enterprise versions of Stratus Desktop. |
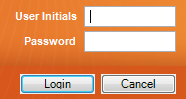
If you have not activated the security features in Stratus, this is where you can initially turn them on by checking Activate Security Settings. When you activate security in the software, the way users log in will change. You will no longer see a list of names to choose from. Instead, users will be prompted for their User Initials and Password. Note: Once security has been turned on, it cannot be turned off.
Once security has been enabled, you will be able to select a Default Security Group for New Users. You may also choose to Enable Strong Security, turning on enhanced security features (i.e. User passwords will expire every 30 days). With security enabled, you can assign varying security levels to your users by using Security Groups. Go to Maintenance > General (Studio) > Security Groups to set them up. You can also decide if users will be required to use a password to log in. See also: Security Groups and Users
Application Timeout Settings #
Check the Auto Logoff option and enter the number of minutes to have the software automatically log off users when a computer is inactive for the specified amount of time. Note: This is based on computer inactivity, not Stratus Desktop inactivity. The automatic logoff will also release the database connection, preventing potential issues with automatic nightly backups.
Time Clock Options #
| |
NOTE: This feature is available in the Essential, Professional, and Enterprise versions of Stratus Desktop. |
Check the “Prompt” option to require users to enter their credentials when accessing the time clock. For example, studios that use generic logins can use this option to make sure each individual user’s time clock cannot be modified by other users. Also decide if the software should use a global Internet clock instead of the system clock. This setting prevents users from adjusting their time by changing their system clock. See also: Time Clock
 #
#
Notes Time Stamp Options #
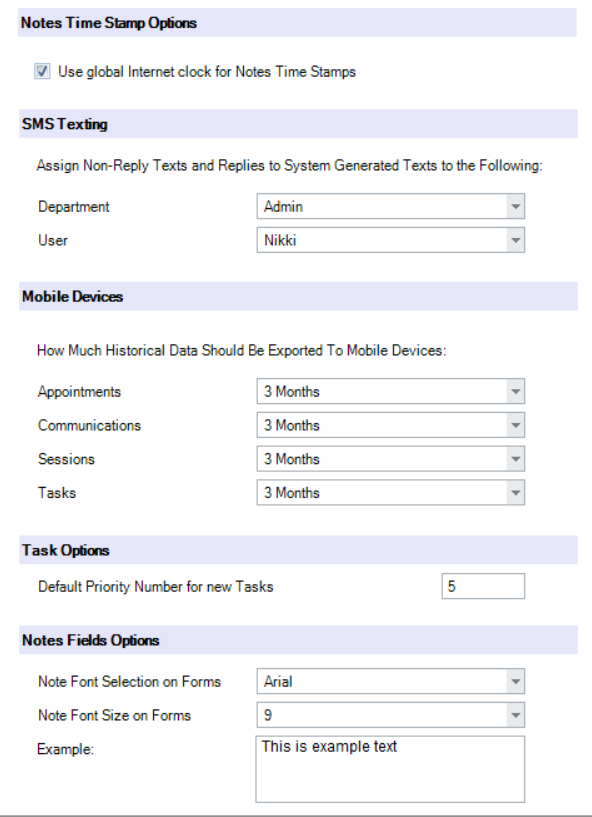
Decide if the software should use a global Internet clock instead of the system clock when calculating time stamp entries on the Notes tab of all records. This setting prevents users from creating false time stamps by changing their system clock.
SMS Texting #
| |
NOTE: This feature is available in the Essential, Professional, and Enterprise versions of Stratus Desktop. |
Note: This feature only affects clients with a Dedicated SMS Number and Stratus Users. Spectra users without a Dedicated SMS Number do not need to use this feature as their control center is run by a specific user.
When receiving incoming texts for a dedicated number or a response to an automatic text generated by Stratus, select which department and/or user the text should be assigned to. With a dedicated SMS number, potential clients can text that number without being in the system. This setting allows those texts to go directly to a specific department/user. As another example, a Stratus user may have automatic texts sent out as a part of a Trigger or the Communication Wizard. These texts are generated by the Stratus Control Center, not an actual user. This option allows responses to these texts to be assigned to a user in the system. Choose a department and/or a user that should receive these messages.
See Also: Triggers and Communication Wizard
For more information on Dedicated Numbers, contact our Sales department at Sales@StudioPlusSoftware.com
Mobile Devices #
| |
NOTE: This feature is available in the Essential, Professional, and Enterprise versions of Stratus Desktop. Spectra does not include this feature. |
The Stratus Mobile App exports a smaller version of your overall database in order to speed up the syncing process. This setting allows you to select how much historical data you want to export to your mobile device. Recurring Appointments are not included in this setting; both past and future recurring appointments will export as normal. The less data that the mobile app has to export at a time, the more efficient the sync process will be. Select Do Not Export to keep the mobile app from exporting any data aside from today’s date. By selecting 0 Months, all future data will be exported but no historical data will be exported. Note: Due to the database export, this setting will not take effect until the next time the database is exported for the mobile app. It may take up to 24 hours for the new setting to take effect. After the 24 hours, go to More > Utilities > Reset Local Database to reset the database and login again.
Task Options
#
Select the default Priority Number for newly created tasks.
Notes Field Options #
Define the Font Style as well as Font Size that should display on all Notes tabs in the software. This section will also display an example of how the text will appear on your records.