

   |
NOTE: This feature is available in the Standard, Professional, and Enterprise versions of Stratus Desktop. Spectra does not include this feature. |
Want to speed up your syncing times for the Mobile app? Take a look at Maintenance > Preferences > Company Preferences > Miscellaneous tab > Mobile Devices in the Desktop app to see if you can lower the amount of data that gets exported into the app. See Company Preferences – Miscellaneous for more info!
Viewing Schedules #
-
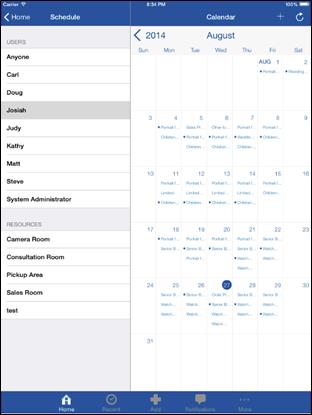
Tap Schedule on the home page see a list of appointments and sessions.
-
Choose the User or Resource you wish to view the schedule for.
-
To change the date, scroll up and down through the months.
-
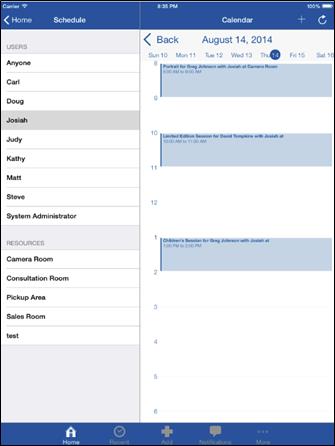
To view a week, just select a day that week.
-
Tap any session or appointment to view and modify it.
-
Sessions and linked appointments will display client information at the top (for viewing purposes only).
-
To modify the client information, go down to the bottom of the session or appointment and tap the Client field to open the client record.
-
Booking a Session #
From a Client (new or existing clients):
-
Create a new client (or find an existing one in your database).
-
Go the to bottom of the client information and tap the Sessions field.
-
Click the plus “+” at the top to add a new session.
-
Fill in the session date, time, and other details.
-
Click Save.
Quick Add (existing clients only):
-
Tap Add at the bottom of the screen and then tap Session.
-
Choose the client from the list.
-
Fill in the session information.
-
Click Save.
Scheduling an Appointment
#
From a Client (new or existing clients):
-
Create a new client (or find an existing one in your database).
-
Go the to bottom of the client information and tap the Appointments field.
-
Click the plus “+” at the top to add a new appointment.
-
Fill in the appointment date, time, and other details.
-
Click Save.
Quick Add (existing clients or unlinked appointments only):
-
Tap Add at the bottom of the screen and then tap Appointment.
-
Choose the client from the list or tap Unlinked.
-
Fill in the appointment information.
-
Click Save.