
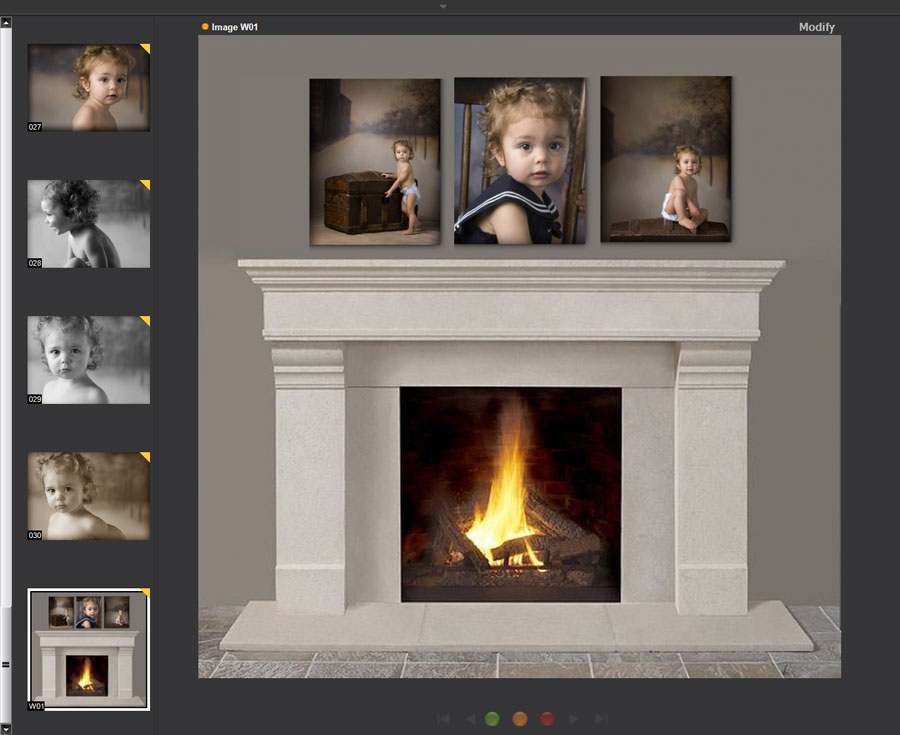
Use Wall Art to display your client’s images on their own walls! Create your own set of wall layouts (templates) or just use a single image and resize it to show what it will really look like in their space. You can even add the entire grouping to their order with just one click!
Key Points #
- Wall art can be created with Wall Art Layouts that have been designed with the Digital Template Builder. See also: Designing Wall Art Layouts
- Wall art can also be created by dragging the client’s images onto a wall and then arranging and resizing them as needed. Sizes are determined by your Image Size settings. See also: Image Sizes
- Client walls can be imported and used to create wall art. Any imported client walls are attached to the client’s record to be used with future sessions as well. See also: Wall Art Library
Creating Wall Art #
-
Select a session on the Workflow hub (or in the Sales Presentation module).
-
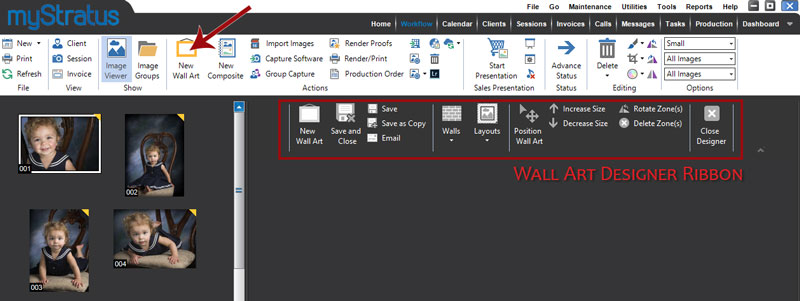
Click New Wall Art on the ribbon. A new set of tools will appear below the main ribbon. This is the Wall Art Designer.
-
The first step in creating new wall art is to choose a wall for displaying the images. Open the Walls menu and choose one of your stock images or one of the client’s walls.
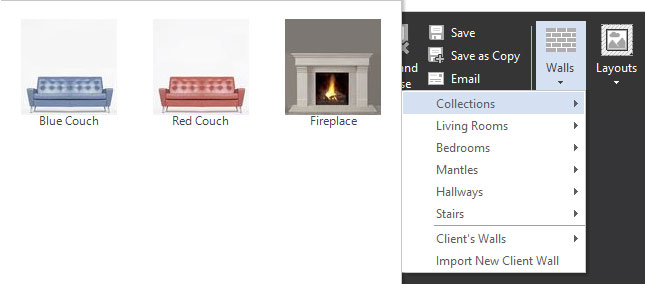
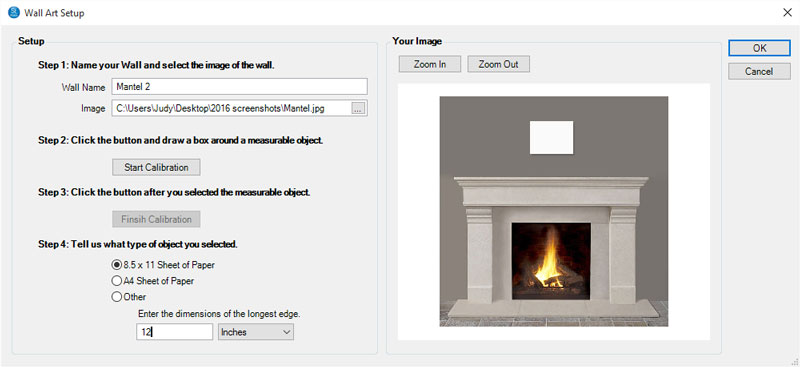
If you haven’t imported any walls for the client, just click Import New Client Wall to do it now. A window will open where you can import and calibrate a new wall image. For more about importing and calibrating wall images, refer to the Wall Art Library topic.
-
After you’ve selected a wall, you can either choose a layout or drag an image over to the wall.
-
Choose a Layout – Open the Layouts menu and choose one of your Wall Art Layouts or one of your Single Image Sizes. Layouts are wall grouping templates designed with the Digital Template Builder. Single image sizes are set up in Maintenance > Digital > Image Sizes. See also: Designing Wall Art Layouts and Image Sizes
-
Drag an Image – Drag a single image from the thumbnail panel to the wall. The image will appear at the default size you’ve chosen on the Digital tab in your Company Preferences. See also: Company (Studio) Preferences – Digital
- Now drag client images from the thumbnail panel to fill the drop zones in your wall art. Use your mouse to move the image within the zone and use your scroll wheel to enlarge the image.
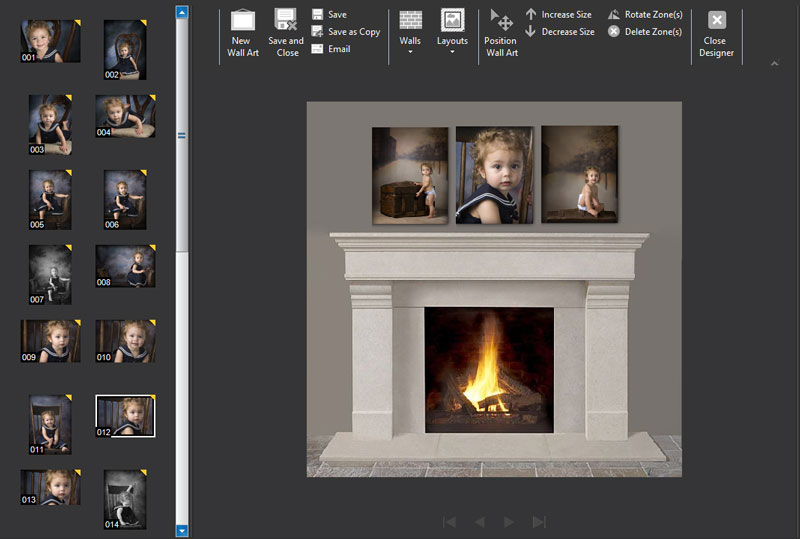
- There are several ways to modify your wall art. You can:
-
Replace an image – Click a zone and then drag and drop a replacement image.
-
Move zone(s) – Use your mouse to draw a selection band around the zone(s) you want to move. With the zone(s) highlighted, use your mouse to adjust the position.
-
Resize a single zone – Use your mouse to draw a selection band around the zone you want to resize. Click Increase and Decrease on the ribbon to modify the size. Note: Size increments are determined by your Image Size list (Maintenance > Digital > Image Sizes). For example, if you have a 16×20 on the wall and you increase the size, it will automatically increase to the next largest size in your Image Size list.
-
Resize the entire layout – Use your mouse to draw a selection band around the entire layout. Click Increase and Decrease on the ribbon to modify the size of each zone in the layout. Note: Depending on the correlation between the size of each zone and your Image Size list, the behavior may be unpredictable when resizing an entire layout.
-
Delete zone(s) – Use your mouse to draw a selection band around the zone(s) you want to delete and click Delete Zone on the ribbon.
-
Rotate zone(s) – Use your mouse to draw a selection band around the zone(s) you want to rotate and click Rotate Zone on the ribbon. Note: This rotates the zone, not the image.
- Save the wall art when finished.
Ordering Wall Art #
-
Open the session in the Sales Presentation module.
-
Click the wall art thumbnail to display it in the center panel.
-
Click Modify to make any necessary changes (i.e., choose a different pose for one of the items). Save and close the wall art after making changes.
-
Open the Sales Presentation ribbon and click Order Info.
-
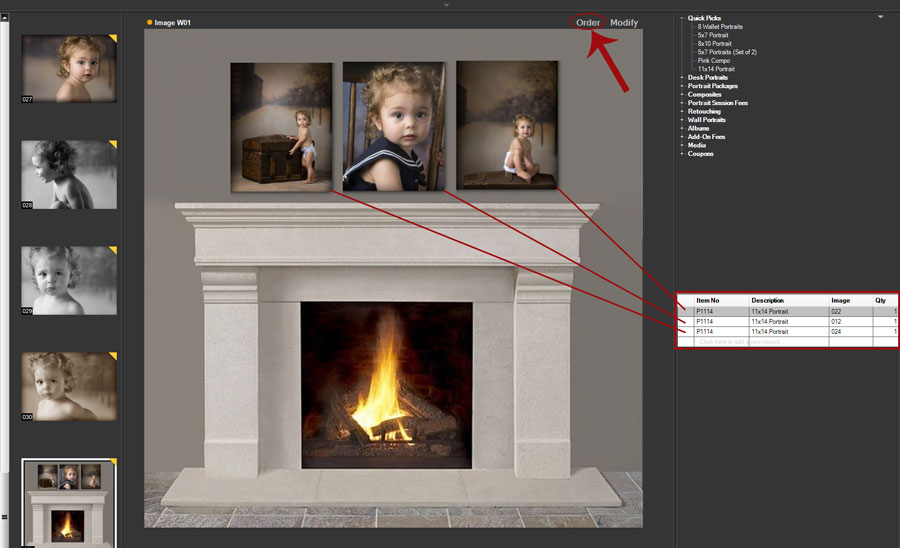
There will now be an Order option above the right corner of the wall art.
-
Click Order and each item (and pose) will be added to the order. Note: Your price list is scanned for products matching the size of the item. If there are several matches, a window will open to allow you to choose the right product.
-
Continue with the order as needed.
-
Save and close the order when finished.


