
   |
NOTE: This feature is available in the Essential, Professional, and Enterprise versions of both Spectra and Stratus Desktop. |
Use the Wall Art Library to build a collection of walls that can be used to display your client’s images.
Key Points #
- Wall images must be JPEG images.
- Wall images must include a measurable object.
Adding a Wall Image to the Library #
-
Go to Maintenance > Digital > Wall Art Library.
-
Choose the group you want to add the image to. Groups are used to organize your images. Create new groups in Maintenance > Digital > Wall Art Groups. See also: Wall Art Groups
-
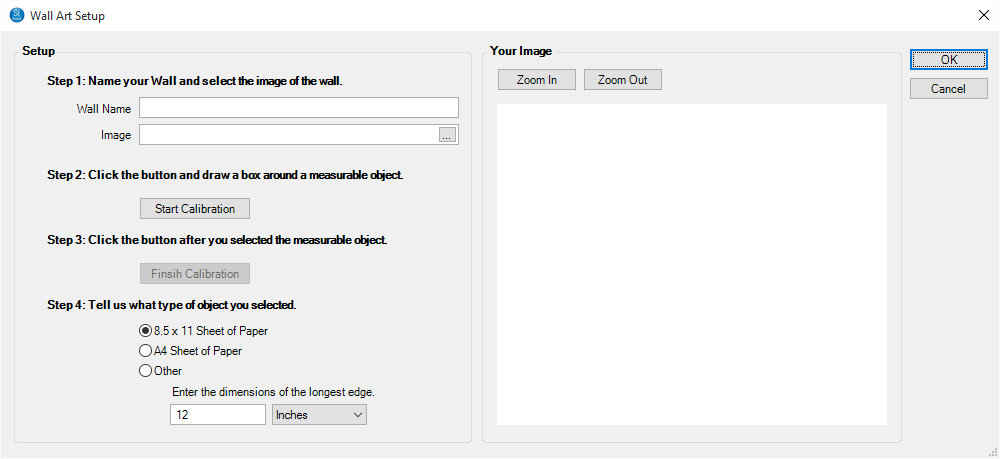
Click New to add a new wall image. The Wall Art Setup window will open.
-
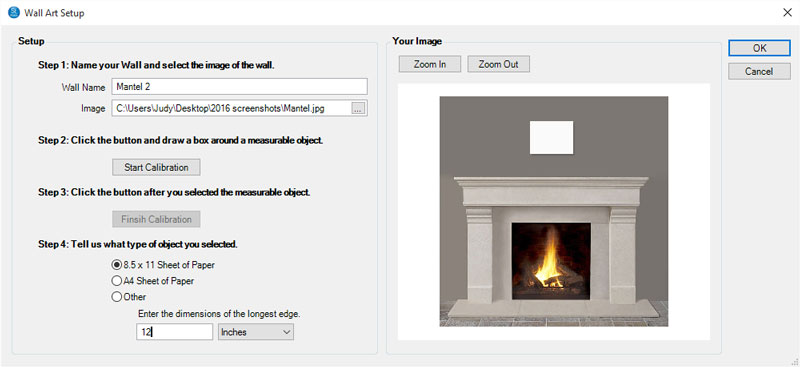
Give the image a name and then click the browse (…) button and locate the image file. Click Open to import the image.
-
To make sure your wall art is accurately scaled to the wall, you need to calibrate the image. You’ll simply outline a measurable item in the image and enter the dimensions.
-
To calibrate the image, click Start Calibration and then use your mouse to draw an outline around a measurable item in the image. When satisfied, click Finish Calibration.
-
Finally, choose one of the dimension options provided. This should match the size of the outlined object.
- 8.5 x 11 Sheet of Paper
- A4 Sheet of Paper
- Other – For this option, enter the dimensions of the longest edge of the outlined object (e.g., the width of a mantle, window, couch, etc.).
-
Click OK to save the wall.
Adding a Wall for a Client
#
You’ll go through the same steps to add a wall for a client. You’ll just need to start in a different place.
-
Open the Workflow hub.
-
Choose the session.
-
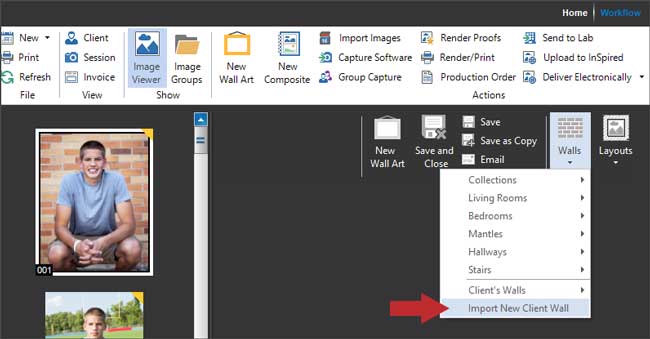
Click New Wall Art on the ribbon.
-
Open the Walls menu on the Designer ribbon and click Import New Client Wall.
-
The Wall Art Setup window will open. Import and calibrate the wall the same as when adding walls to the library (see instructions above).
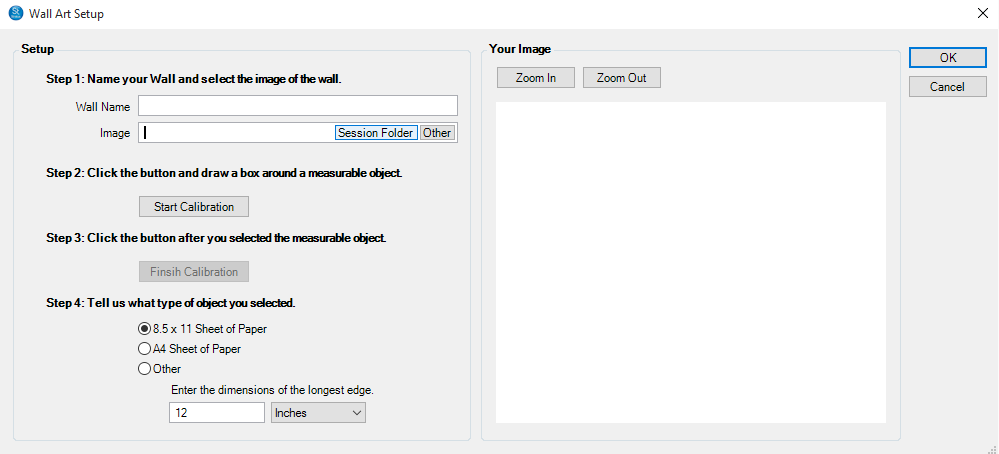
Note: You’ll also have the option to look for the image in the Session Folder. Some photographers shoot on location at the client’s home and may decide to take wall shots at the same time. Import them along with the session to make them easy to find! -
Click OK to save the wall.
-
The calibrated wall image will be saved as an attachment to the client’s record, making it available for future sessions as well. You can see these images on the Attachments tab of the client record. For more about attachments, see Attaching a File.


